Key Words: Tensorflow, Bazel, CC&Python, Cuda
主流深度学习框架对比
在进入一个领域之前,第一件紧要事就是寻找领域的“巨头”,也即代表性产品,以作为进入的敲门砖。深度学习领域近几年迅速发展,已经有多个成熟的开源框架可供选择,俨然成为了Big Data领域继Hadoop、Spark、图计算、流计算之后的又一战略高地。
2016年发表于KDD的论文《Comparative Study of Deep Learning Software Frameworks》对已有框架进行了详细论述,目前主流的开源框架包括:Caffe2,Torch,MXNet,Tensorflow等。
笔者计划在后续工作中对框架源码进行修改并移植至手机端,因此在进行技术选型时从以下几个方面进行了考量:
- 设计语言
- 目前在工业界和学术界的接受度
- 源码的可读性
- 相关技术文档的完善度
- 目前对于手机端的支持情况
通过以上五方面的对比,笔者最终选择了Tensorflow框架。
这一框架主体由C++语言编写,C家族是学习系统层或以下所必备的语言,底层的资源管理完全要依托于C/汇编层级,相比之下,Java实在过于上层,不利于对整个系统的深入理解。
Tensorflow由Google设计并开源,G的技术水平和推广能力毋庸置疑,它在学术界和工业界的号召力保证了TF在未来一段时间的生命力,这一点从GitHub上被Star和Fork的数量可以判断。
TF是谷歌集中很多领域专家搞起来的,里面优秀的设计思想和实现非常值得学习,大名鼎鼎的Jeffrey Dean正是TF的重要设计者之一,很多独当一面的大牛在这里都干起了调bug的本行…
Google对TF进行了大量人力和财力的投入,这些正规军保证了TF的文档资料不会像一些开源社区那样半途而废或者杂乱无章。
目前TF的某些功能已可以支持Android系统,截止撰文时笔者还没有在移动端进行尝试,但估计做的还很简陋。
Tensorflow安装
我们首先来看一下怎样对TF直接安装,这里笔者的操作系统是Ubuntu-14.04。
对于TF的安装,以及相关编译链的构建,注意:
版本很重要,版本很重要,版本很重要!
这里我们选择Tensorflow-1.3进行安装,截至撰文,r1.3是仅次于master的branch,属于次新的版本。(master版本太新,介绍文档以及与其它软件的兼容匹配度还不成熟)。
确定TF版本之后开始准备搭建环境。
一、Cuda安装
Cuda(Compute Unified Device Architecture),是英伟达公司推出的一种基于新的并行编程模型和指令集架构的通用计算架构,它能利用英伟达GPU的并行计算引擎,比CPU更高效的解决许多复杂计算任务。
Cuda的官方下载地址为:
https://developer.nvidia.com/cuda-downloads
这里需要在NVIDA官网注册一个免费用户才能下载,注册账号:l###@163.com,密码:Us123456。
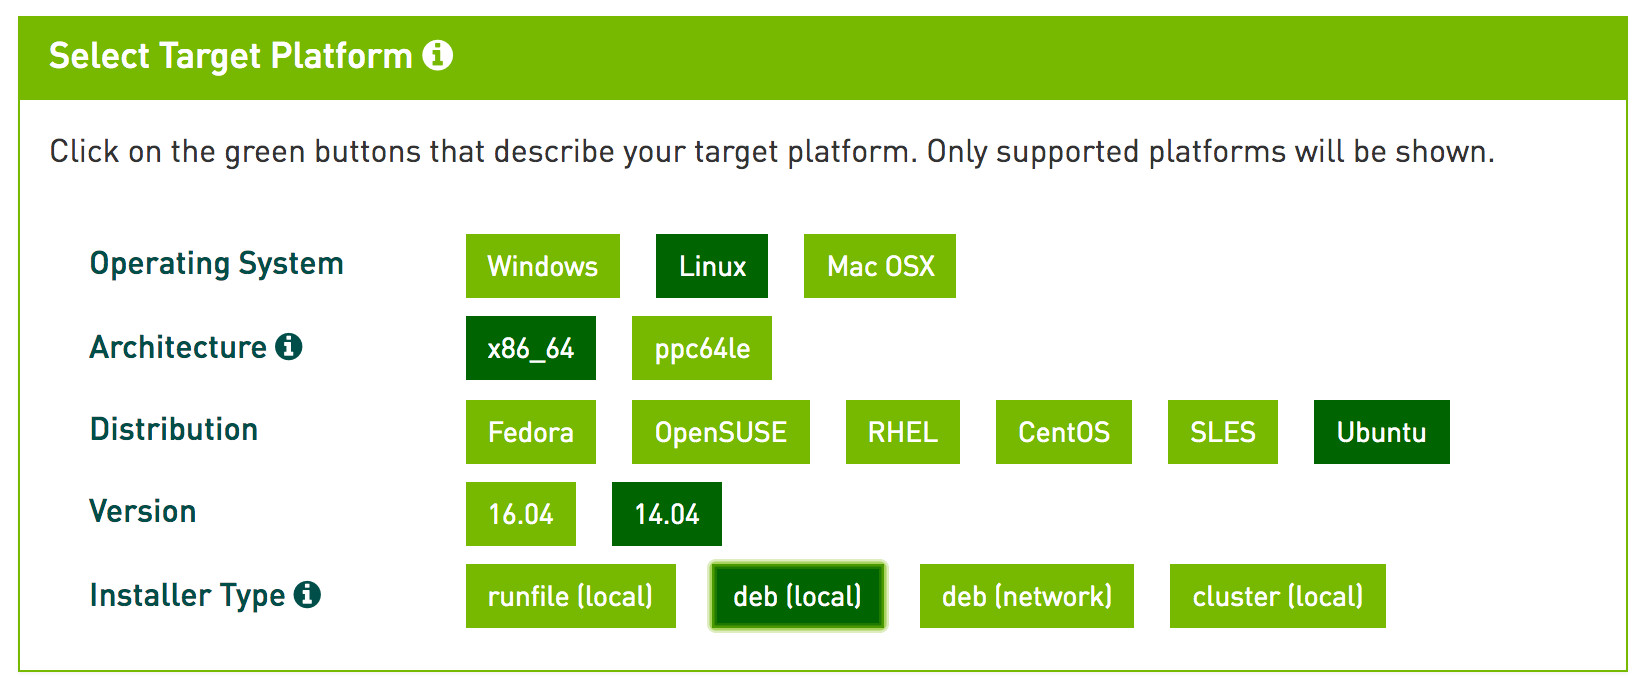
这里安装类型选择 deb(local)。
下载文件cuda-repo-ubuntu1404-8-0-local-ga2_8.0.61-1_amd64.deb(1.9GB),版本为8.0。
将文件下载至“/home/chrisli/Cloud/Tensorflow/”目录:

执行命令:
$ sudo dpkg -i cuda-repo-ubuntu1404-8-0-local-ga2_8.0.61-1_amd64.deb
$ sudo apt-get update
$ sudo apt-get install cuda
默认安装在:/usr/local/cuda
二、cuDNN安装
NVIDIA cuDNN是用于深度神经网络的GPU加速库。它强调性能、易用性和低内存开销。
cuDNN下载地址:https://developer.nvidia.com/cudnn
这里注意,选择的cuDNN版本既要和Cuda兼容,又要支持1.3版本的Tensorflow。
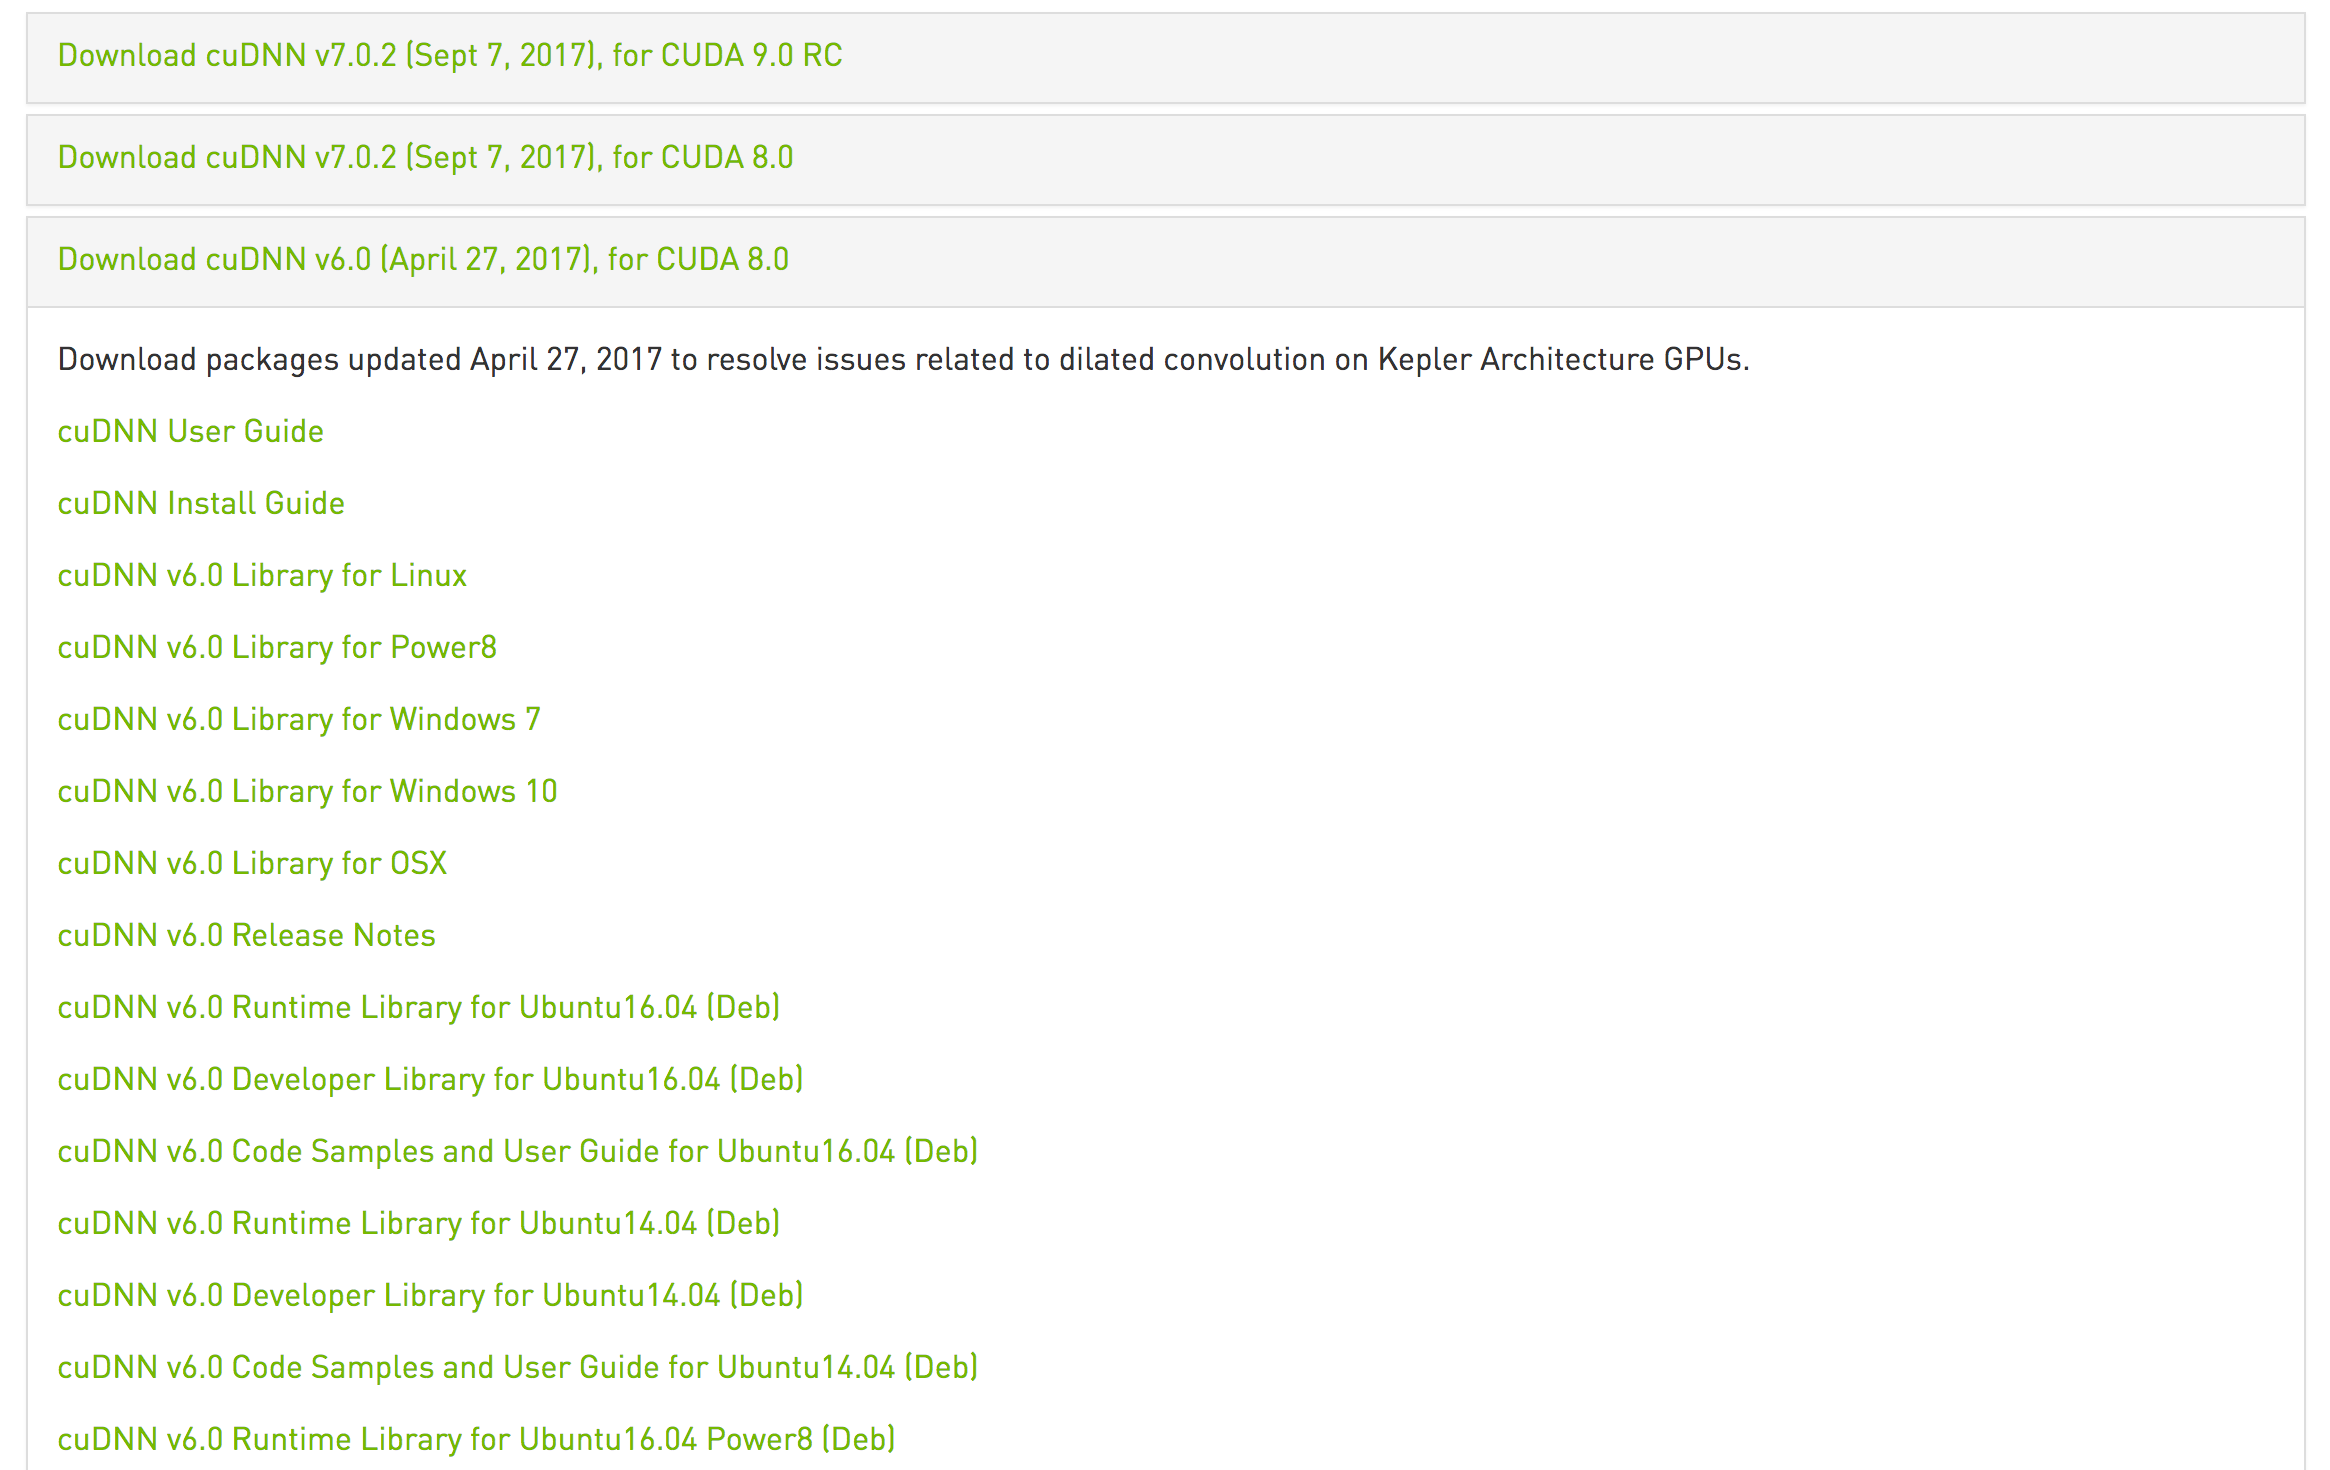
我们选择了“cuDNN v6.0 for CUDA 8.0”,上图中需要下载的是 “cuDNN v6.0 Library for Linux”而不是deb文件,在初期笔者曾犯过这个错误。
同上,输入以下命令:
$ tar xvzf cudnn-7.0-linux-x64-v4.0-prod.tgz

$ sudo cp cuda/include/cudnn.h /usr/local/cuda/include

$ sudo cp cuda/lib64/libcudnn* /usr/local/cuda/lib64

$ sudo chmod a+r /usr/local/cuda/lib64/libcudnn*
安装完成之后,可以通过如下命令分别查看Cuda和cuDNN的版本信息:
$ cat /usr/local/cuda/version.txt
$ cat /usr/local/cuda/include/cudnn.h | grep CUDNN_MAJOR -A 2
三、Python开发环境
$ sudo apt-get install python-numpy python-pip swig python-dev python-wheel
$ sudo pip install six numpy wheel
根据官网描述,需要安装python3.x版本的,可以执行如下操作:
$ sudo apt-get install python3-numpy python3-dev python3-pip python3-wheel
这里笔者使用的2.7版本,并未对3.x版进行尝试。
四、Tensorflow下载安装
在终端利用pip直接安装
$ sudo pip install --upgrade https://storage.googleapis.com/tensorflow/linux/cpu/tensorflow-1.3.0-cp27-none-linux_x86_64.whl
注意,这里的“tensorflow-1.3.0-cp27-none-linux_x86_64.whl”安装包,也就是我们后面编译源码的目标,对TF源码编译的最终结果就是生成这样一个安装包,然后本地进行安装。
五、检验是否安装成功
通过如下一段代码检验是否安装成功:
$ python
...
>>> import tensorflow as tf
>>> hello = tf.constant('Hello, TensorFlow!')
>>> sess = tf.Session()
>>> print(sess.run(hello))
Hello, TensorFlow!
>>> a = tf.constant(10)
>>> b = tf.constant(32)
>>> print(sess.run(a + b))
42
>>>
从安装进度来看,输入“import tensorflow as tf”语句仅仅算是完成了一半,因为各式各样的ERROR在敲下回车键后出现,详情会在[疑难问题]一章总结。
编译环境搭建
一、Bazel安装
Bazel是Google开源构建工具,类似于Make的工具,用来编译Tensorflow。
Bazel目前已被Google开源并托管在GitHub,地址:https://github.com/bazelbuild/bazel/releases
这里下载的是.sh的脚本文件,我们选择版本bazel-0.5.4。
$ sudo apt-get install pkg-config zip g++zlib1g-dev unzip
$ chmod +x bazel-0.5.4-installer-linux-x86_64.sh
$ ./bazel-0.5.4-installer-linux-x86_64.sh --user
$ export PATH="$PATH:$HOME/bin"
除了手动安装,bazel也支持通过apt-get直接安装,这种方式更为简便,当然对版本选择的控制力会被削弱。
详细步骤可参考:https://docs.bazel.build/versions/master/install-ubuntu.html
二、TensorFlow源码下载
TF源码同样托管于GitHub:https://github.com/tensorflow/tensorflow
注意默认Branch是master,但master在编译时仍有问题(版本兼容性问题),所以这里选择克隆r1.3版。
$ git clone -b r1.3 https://github.com/tensorflow/tensorflow.git
可以通过 git branch 确认分支。
三、配置文件
编译前通过Configure文件进行配置。
$ cd tensorflow  # cd to the top-level directory created
$ ./configure
Please specify the location of python. [Default is /usr/bin/python]: /usr/bin/python2.7
Found possible Python library paths:
/usr/local/lib/python2.7/dist-packages
/usr/lib/python2.7/dist-packages
Please input the desired Python library path to use.  Default is [/usr/lib/python2.7/dist-packages]

Using python library path: /usr/local/lib/python2.7/dist-packages
Do you wish to build TensorFlow with MKL support? [y/N]
No MKL support will be enabled for TensorFlow
Please specify optimization flags to use during compilation when bazel option "--config=opt" is specified [Default is -march=native]:
Do you wish to use jemalloc as the malloc implementation? [Y/n]
jemalloc enabled
Do you wish to build TensorFlow with Google Cloud Platform support? [y/N]
No Google Cloud Platform support will be enabled for TensorFlow
Do you wish to build TensorFlow with Hadoop File System support? [y/N]
No Hadoop File System support will be enabled for TensorFlow
Do you wish to build TensorFlow with the XLA just-in-time compiler (experimental)? [y/N]
No XLA support will be enabled for TensorFlow
Do you wish to build TensorFlow with VERBS support? [y/N]
No VERBS support will be enabled for TensorFlow
Do you wish to build TensorFlow with OpenCL support? [y/N]
No OpenCL support will be enabled for TensorFlow
Do you wish to build TensorFlow with CUDA support? [y/N] Y
CUDA support will be enabled for TensorFlow
Do you want to use clang as CUDA compiler? [y/N]
nvcc will be used as CUDA compiler
Please specify the Cuda SDK version you want to use, e.g. 7.0. [Leave empty to default to CUDA 8.0]: 8.0
Please specify the location where CUDA 8.0 toolkit is installed. Refer to README.md for more details. [Default is /usr/local/cuda]:
Please specify which gcc should be used by nvcc as the host compiler. [Default is /usr/bin/gcc]:
Please specify the cuDNN version you want to use. [Leave empty to default to cuDNN 6.0]: 6
Please specify the location where cuDNN 6 library is installed. Refer to README.md for more details. [Default is /usr/local/cuda]:
Please specify a list of comma-separated Cuda compute capabilities you want to build with.
You can find the compute capability of your device at: https://developer.nvidia.com/cuda-gpus.
Please note that each additional compute capability significantly increases your build time and binary size.
[Default is: "3.5,5.2"]: 3.0
Do you wish to build TensorFlow with MPI support? [y/N]
MPI support will not be enabled for TensorFlow
Configuration finished
四、编译
随后,执行如下命令进行编译:
$ bazel build --config=opt //tensorflow/tools/pip_package:build_pip_package
$ bazel-bin/tensorflow/tools/pip_package/build_pip_package /tmp/tensorflow_pkg
如果支持Cuda,可以:
$ bazel build --config=opt --config=cuda //tensorflow/tools/pip_package:build_pip_package
$ bazel-bin/tensorflow/tools/pip_package/build_pip_package /tmp/tensorflow_pkg
执行成功后,会生成安装包,直接本地安装即可:
$ sudo pip install /tmp/tensorflow_pkg/tensorflow-1.3.0-cp27-none-linux_x86_64.whl
当然,各种奇葩问题会出现在编译阶段。
疑难问题
以下问题均在笔者动手部署时出现过,其中部分源码引自网络。
一、ImportError: No module named ‘_pywrap_tensorflow_internal’ 解决方法
>>>import tensorflow
Traceback (most recent call last):
File "C:\Program Files\Anaconda3\lib\site-packages\tensorflow\python\pywrap_tensorflow_internal.py", line 18, in swig_import_helper
return importlib.import_module(mname)
File "C:\Program Files\Anaconda3\lib\importlib\__init__.py", line 126, in import_module
return _bootstrap._gcd_import(name[level:], package, level)
File "<frozen importlib._bootstrap>", line 986, in _gcd_import
File "<frozen importlib._bootstrap>", line 969, in _find_and_load
File "<frozen importlib._bootstrap>", line 958, in _find_and_load_unlocked
File "<frozen importlib._bootstrap>", line 666, in _load_unlocked
File "<frozen importlib._bootstrap>", line 577, in module_from_spec
File "<frozen importlib._bootstrap_external>", line 906, in create_module
File "<frozen importlib._bootstrap>", line 222, in _call_with_frames_removed
ImportError: DLL load failed: 找不到指定的模块。

During handling of the above exception, another exception occurred:

Traceback (most recent call last):
File "C:\Program Files\Anaconda3\lib\site-packages\tensorflow\python\pywrap_tensorflow.py", line 41, in <module>
from tensorflow.python.pywrap_tensorflow_internal import *
File "C:\Program Files\Anaconda3\lib\site-packages\tensorflow\python\pywrap_tensorflow_internal.py", line 21, in <module>
_pywrap_tensorflow_internal = swig_import_helper()
File "C:\Program Files\Anaconda3\lib\site-packages\tensorflow\python\pywrap_tensorflow_internal.py", line 20, in swig_import_helper
return importlib.import_module('_pywrap_tensorflow_internal')
File "C:\Program Files\Anaconda3\lib\importlib\__init__.py", line 126, in import_module
return _bootstrap._gcd_import(name[level:], package, level)
ImportError: No module named '_pywrap_tensorflow_internal'


Failed to load the native TensorFlow runtime.
这个是由于我之前一个没注意装了cudnn3.0,而r1.3版的tensorflow,需要cudnn6.0
所以把cudnn3.0换成cudnn6.0就好了
二、error in Building tensor flow. [sun.security.validator.ValidatorException:] #12874
解决方案:
i solved it by changing branch r1.3 ->./configure -> build.
May be issue with latest master code.
三、tensorflow build error with bazel (-c to -s)
笔者最初编译时总是出错,直到把参数-c改为-s,第一次编译通过
bazel build -s //tensorflow/tools/pip_package:build_pip_package
奇怪的是,将参数变回来也通过了,任性。。。
四、Cannot import tensorflow in python #1013
>>> import tensorflow as tf
Traceback (most recent call last):
File "<stdin>", line 1, in <module>
File "C:\Users\Or\AppData\Local\Enthought\Canopy\User\lib\site-packages\tensorflow\__init__.py", line 4, in <module>
from tensorflow.python import *
File "C:\Users\Or\AppData\Local\Enthought\Canopy\User\lib\site-packages\tensorflow\python\__init__.py", line 22, in <module>
from tensorflow.python.client.client_lib import *
File "C:\Users\Or\AppData\Local\Enthought\Canopy\User\lib\site-packages\tensorflow\python\client\client_lib.py", line 35, in <module>
from tensorflow.python.client.session import InteractiveSession
File "C:\Users\Or\AppData\Local\Enthought\Canopy\User\lib\site-packages\tensorflow\python\client\session.py", line 11, in <module>
from tensorflow.python import pywrap_tensorflow as tf_session
File "C:\Users\Or\AppData\Local\Enthought\Canopy\User\lib\site-packages\tensorflow\python\pywrap_tensorflow.py", line 28, in <module>
_pywrap_tensorflow = swig_import_helper()
File "C:\Users\Or\AppData\Local\Enthought\Canopy\User\lib\site-packages\tensorflow\python\pywrap_tensorflow.py", line 20, in swig_import_helper
import _pywrap_tensorflow
ImportError: No module named _pywrap_tensorflow
对这一问题的描述主要是版本问题,牵扯到numpy、cuda、cudnn等多个方面,具体可见https://github.com/tensorflow/tensorflow/issues/1013的讨论。
五、AttributeError: type object ‘NewBase’ has no attribute ‘is_abstract’ #2016
>>> import tensorflow as tf I tensorflow/stream_executor/dso_loader.cc:105] successfully opened CUDA library libcublas.so locally I tensorflow/stream_executor/dso_loader.cc:105] successfully opened CUDA library libcudnn.so locally I tensorflow/stream_executor/dso_loader.cc:105] successfully opened CUDA library libcufft.so locally I tensorflow/stream_executor/dso_loader.cc:105] successfully opened CUDA library libcuda.so.1 locally I tensorflow/stream_executor/dso_loader.cc:105] successfully opened CUDA library libcurand.so locally Traceback (most recent call last): File "<stdin>", line 1, in <module> File "/usr/local/lib/python2.7/dist-packages/tensorflow/__init__.py", line 23, in <module> from tensorflow.python import * File "/usr/local/lib/python2.7/dist-packages/tensorflow/python/__init__.py", line 94, in <module> from tensorflow.python.platform import test File "/usr/local/lib/python2.7/dist-packages/tensorflow/python/platform/test.py", line 62, in <module> from tensorflow.python.framework import test_util File "/usr/local/lib/python2.7/dist-packages/tensorflow/python/framework/test_util.py", line 41, in <module> from tensorflow.python.platform import googletest File "/usr/local/lib/python2.7/dist-packages/tensorflow/python/platform/googletest.py", line 32, in <module> from tensorflow.python.platform import benchmark # pylint: disable=unused-import File "/usr/local/lib/python2.7/dist-packages/tensorflow/python/platform/benchmark.py", line 112, in <module> class Benchmark(six.with_metaclass(_BenchmarkRegistrar, object)): File "/usr/lib/python2.7/dist-packages/six.py", line 617, in with_metaclass return meta("NewBase", bases, {}) File "/usr/local/lib/python2.7/dist-packages/tensorflow/python/platform/benchmark.py", line 107, in __new__ if not newclass.is_abstract(): AttributeError: type object 'NewBase' has no attribute 'is_abstract'
I solved this problem by reinstall the package six:
sudo pip uninstall six
sudo pip install six –upgrade –target=”/usr/lib/python2.7/dist-packages”\
以上是查到的解决方案,但在卸载six时出现own by os的提示,无法卸载。
通过
>>> import six
>>> print(six.__version__)
我们发现six的版本并未发生变化,这是因为six实际在本机共存了版本,但默认的那个版本没有改变,因此我们直接rm删除掉了/usr/lib/python2.7/dist-packages目录,奇迹出现了。


同样的问题出现在protobuf:
>>> import protobuf
>>> print protobuf.__version__
Recently, I have learnt a simple method to get the version of the packages, such as numpy, six and protobuf, like this:
pip show numpy six protobuf
六、编译时用户所在路径问题
网上讨论中多次提到,在import tensorflow时要离开其所在目录。
七、RuntimeError: module compiled against API version a but this version of numpy is 9
>>> runfile('/Users/isaiahnields/.spyder2/temp.py', wdir='/Users/isaiahnields/.spyder2')
RuntimeError: module compiled against API version a but this version of numpy is 9
Traceback (most recent call last):
File "<stdin>", line 1, in <module>
File "/Applications/Spyder-Py2.app/Contents/Resources/lib/python2.7/spyderlib/widgets/externalshell/sitecustomize.py", line 685, in runfile
execfile(filename, namespace)
File "/Applications/Spyder-Py2.app/Contents/Resources/lib/python2.7/spyderlib/widgets/externalshell/sitecustomize.py", line 78, in execfile
builtins.execfile(filename, *where)
File "/Users/isaiahnields/.spyder2/temp.py", line 9, in <module>
import cv
File "/Applications/Spyder-Py2.app/Contents/Resources/lib/python2.7/cv.py", line 1, in <module>
from cv2.cv import *
ImportError: numpy.core.multiarray failed to import
>>>
显然,这同样是一个版本不兼容的问题。
import numpy as np
print np.__version__
print np.__path__
解决方案详见:
https://stackoverflow.com/questions/33859531/runtimeerror-module-compiled-against-api-version-a-but-this-version-of-numpy-is & https://stackoverflow.com/questions/28517937/how-can-i-upgrade-numpy

八、Unable to Uninstall Program : Own by OS
这一问题的解决方案有:https://askubuntu.com/questions/647919/unable-to-uninstall-program-own-by-os。
九、ImportError: Need nose >=0.10.0 for tests #4074 Closed
这是一个较明显的问题,也容易解决。

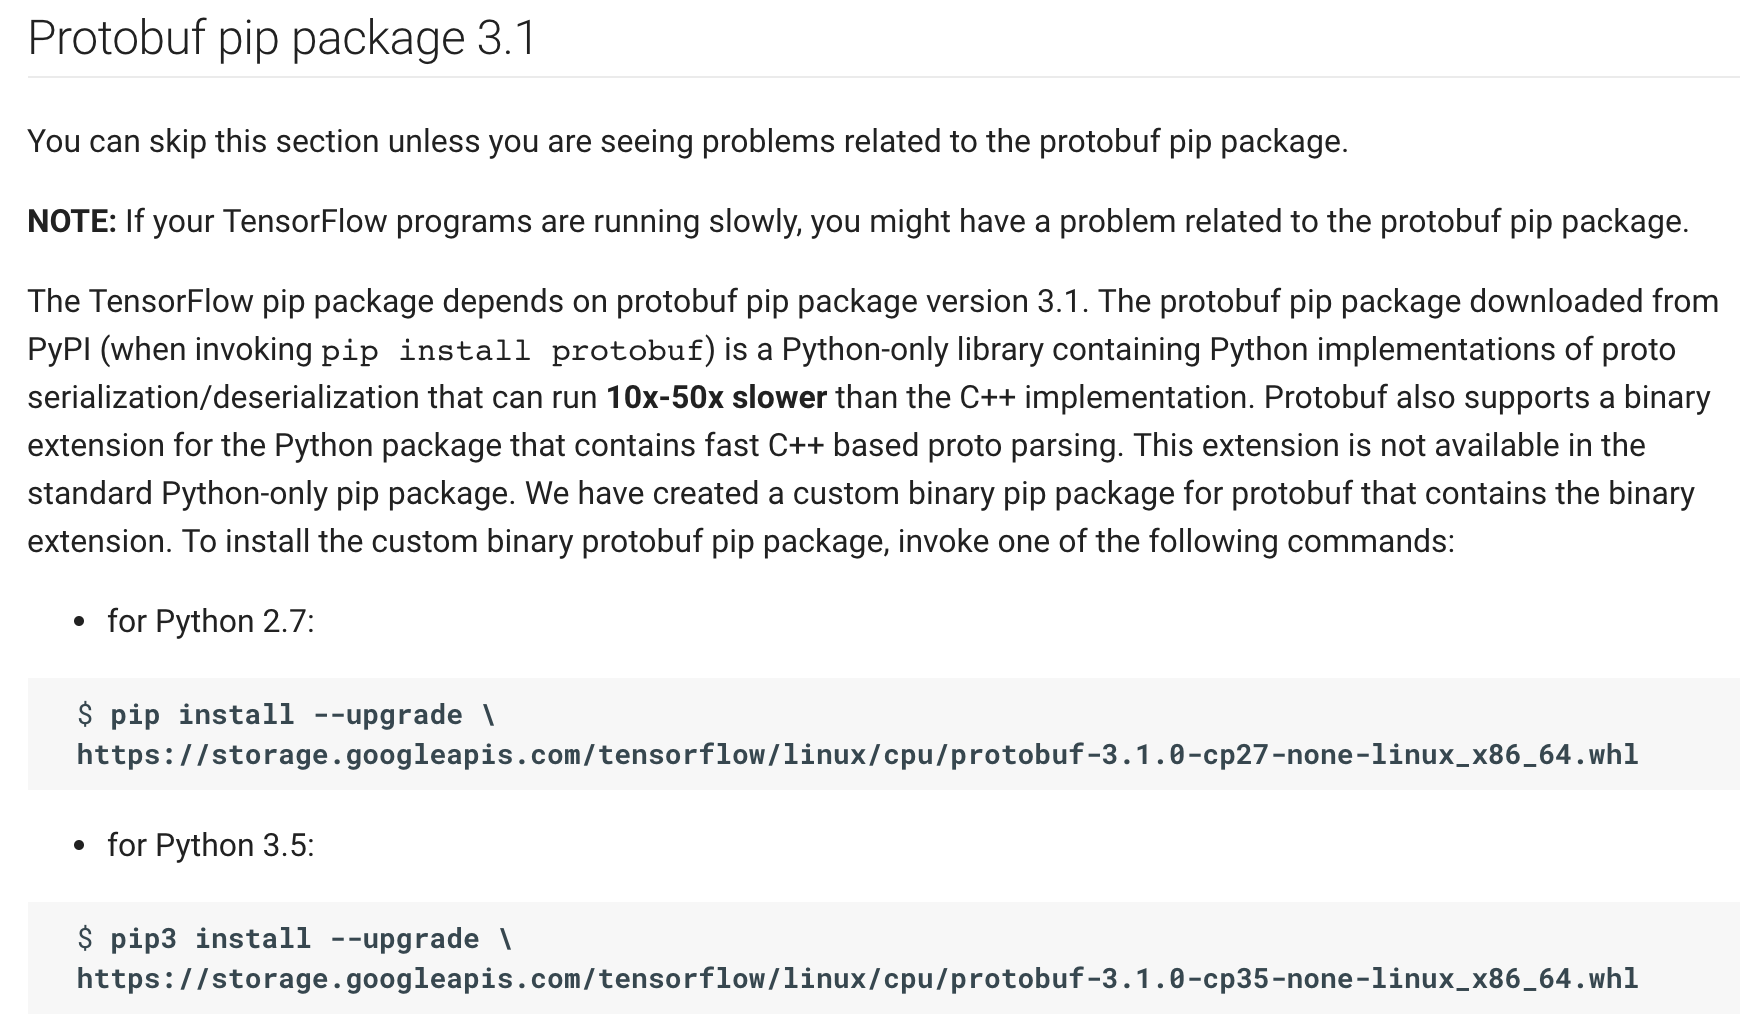
十、protobuf的安装
TF官方教程中并未要求必须安装protobuf,但视情况而定。如果编译或执行时有这一关键字的ERROR,需要对它进行安装。
参考博客
DL框架的未来发展,TensorFlow/MXNet/Torch, 选哪个?-知乎
如何评价Google发布的第二代深度学习系统TensorFlow?-知乎
TensorFlow 从入门到精通(一):安装和使用
Tensorflow环境搭建-CSDN
TensorFlow 如何入门?-知乎
真正从零开始,TensorFlow详细安装入门图文教程!