元宵节了,楼长这里先祝大家新的一年团团圆圆!
楼长搭建资源管理平台的最初动机在于实验室管理的需要,希望通过这样一个平台,促进团队协作、知识积累、新旧成员的能力继承。
这里平台采用的是阿里云租用的服务器,为期三年,具体网址这里就不公布了,上个效果图先~
入门篇
一.功能菜单
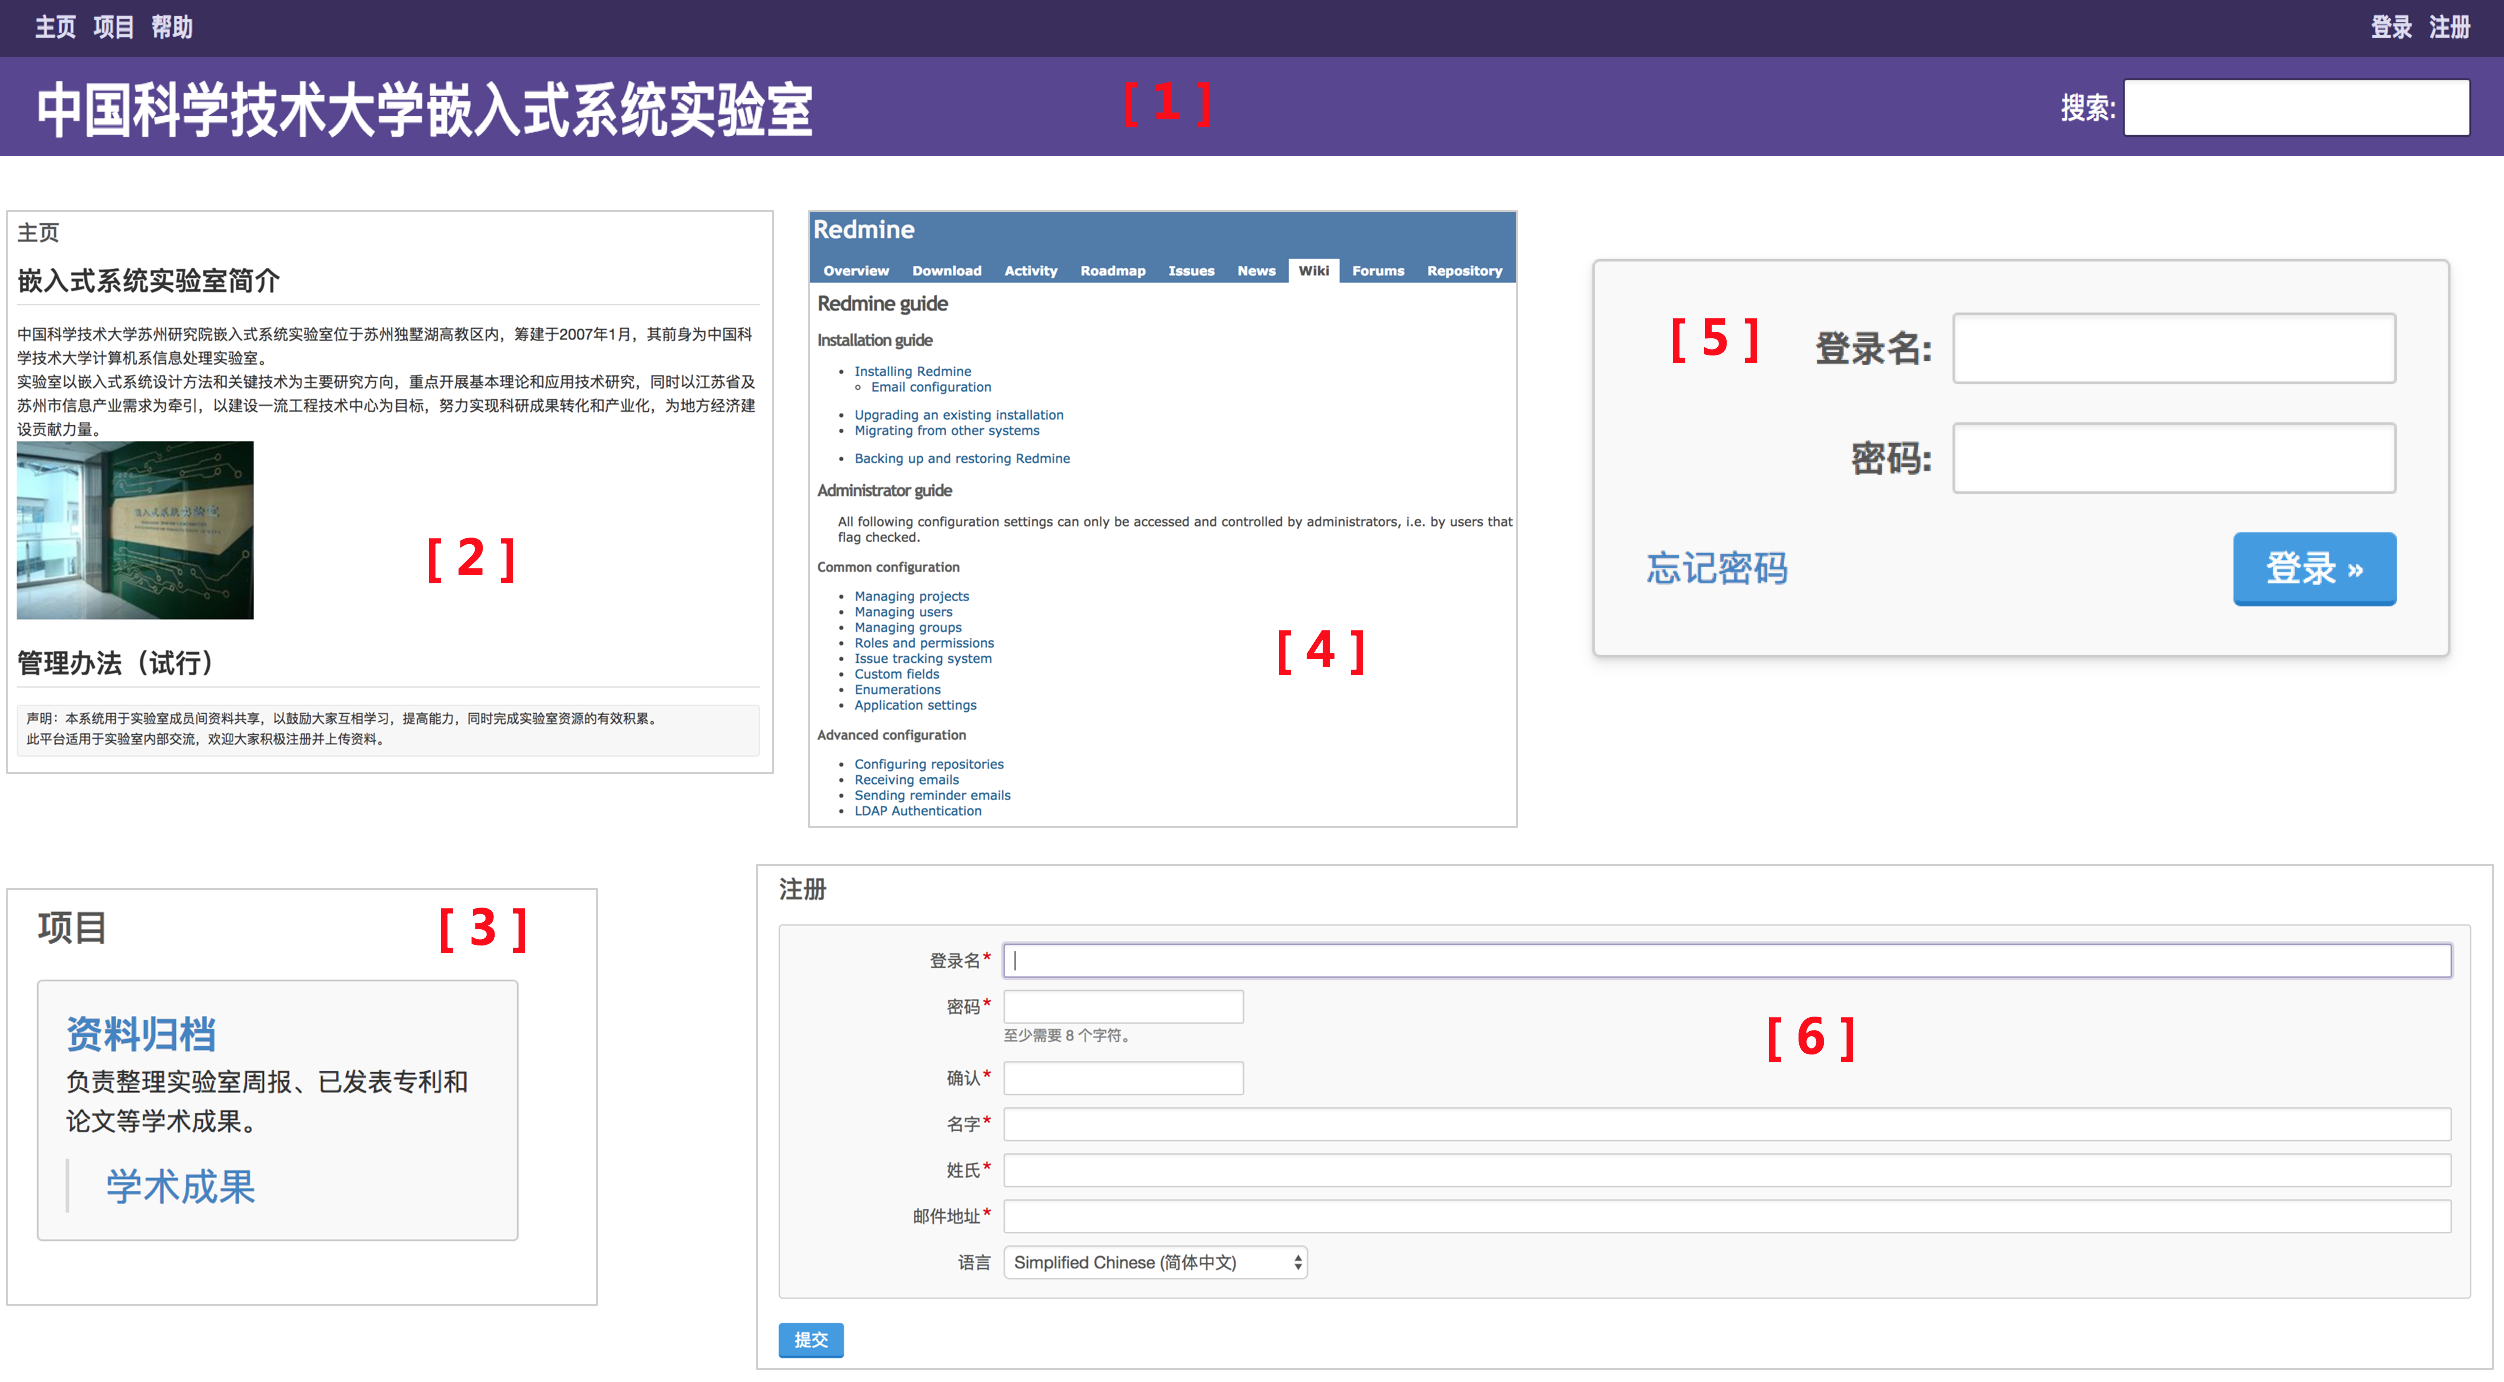
如下图所示,平台主菜单[1]在登录前包括五项内容,分别是:主页,项目,帮助,登录,注册。
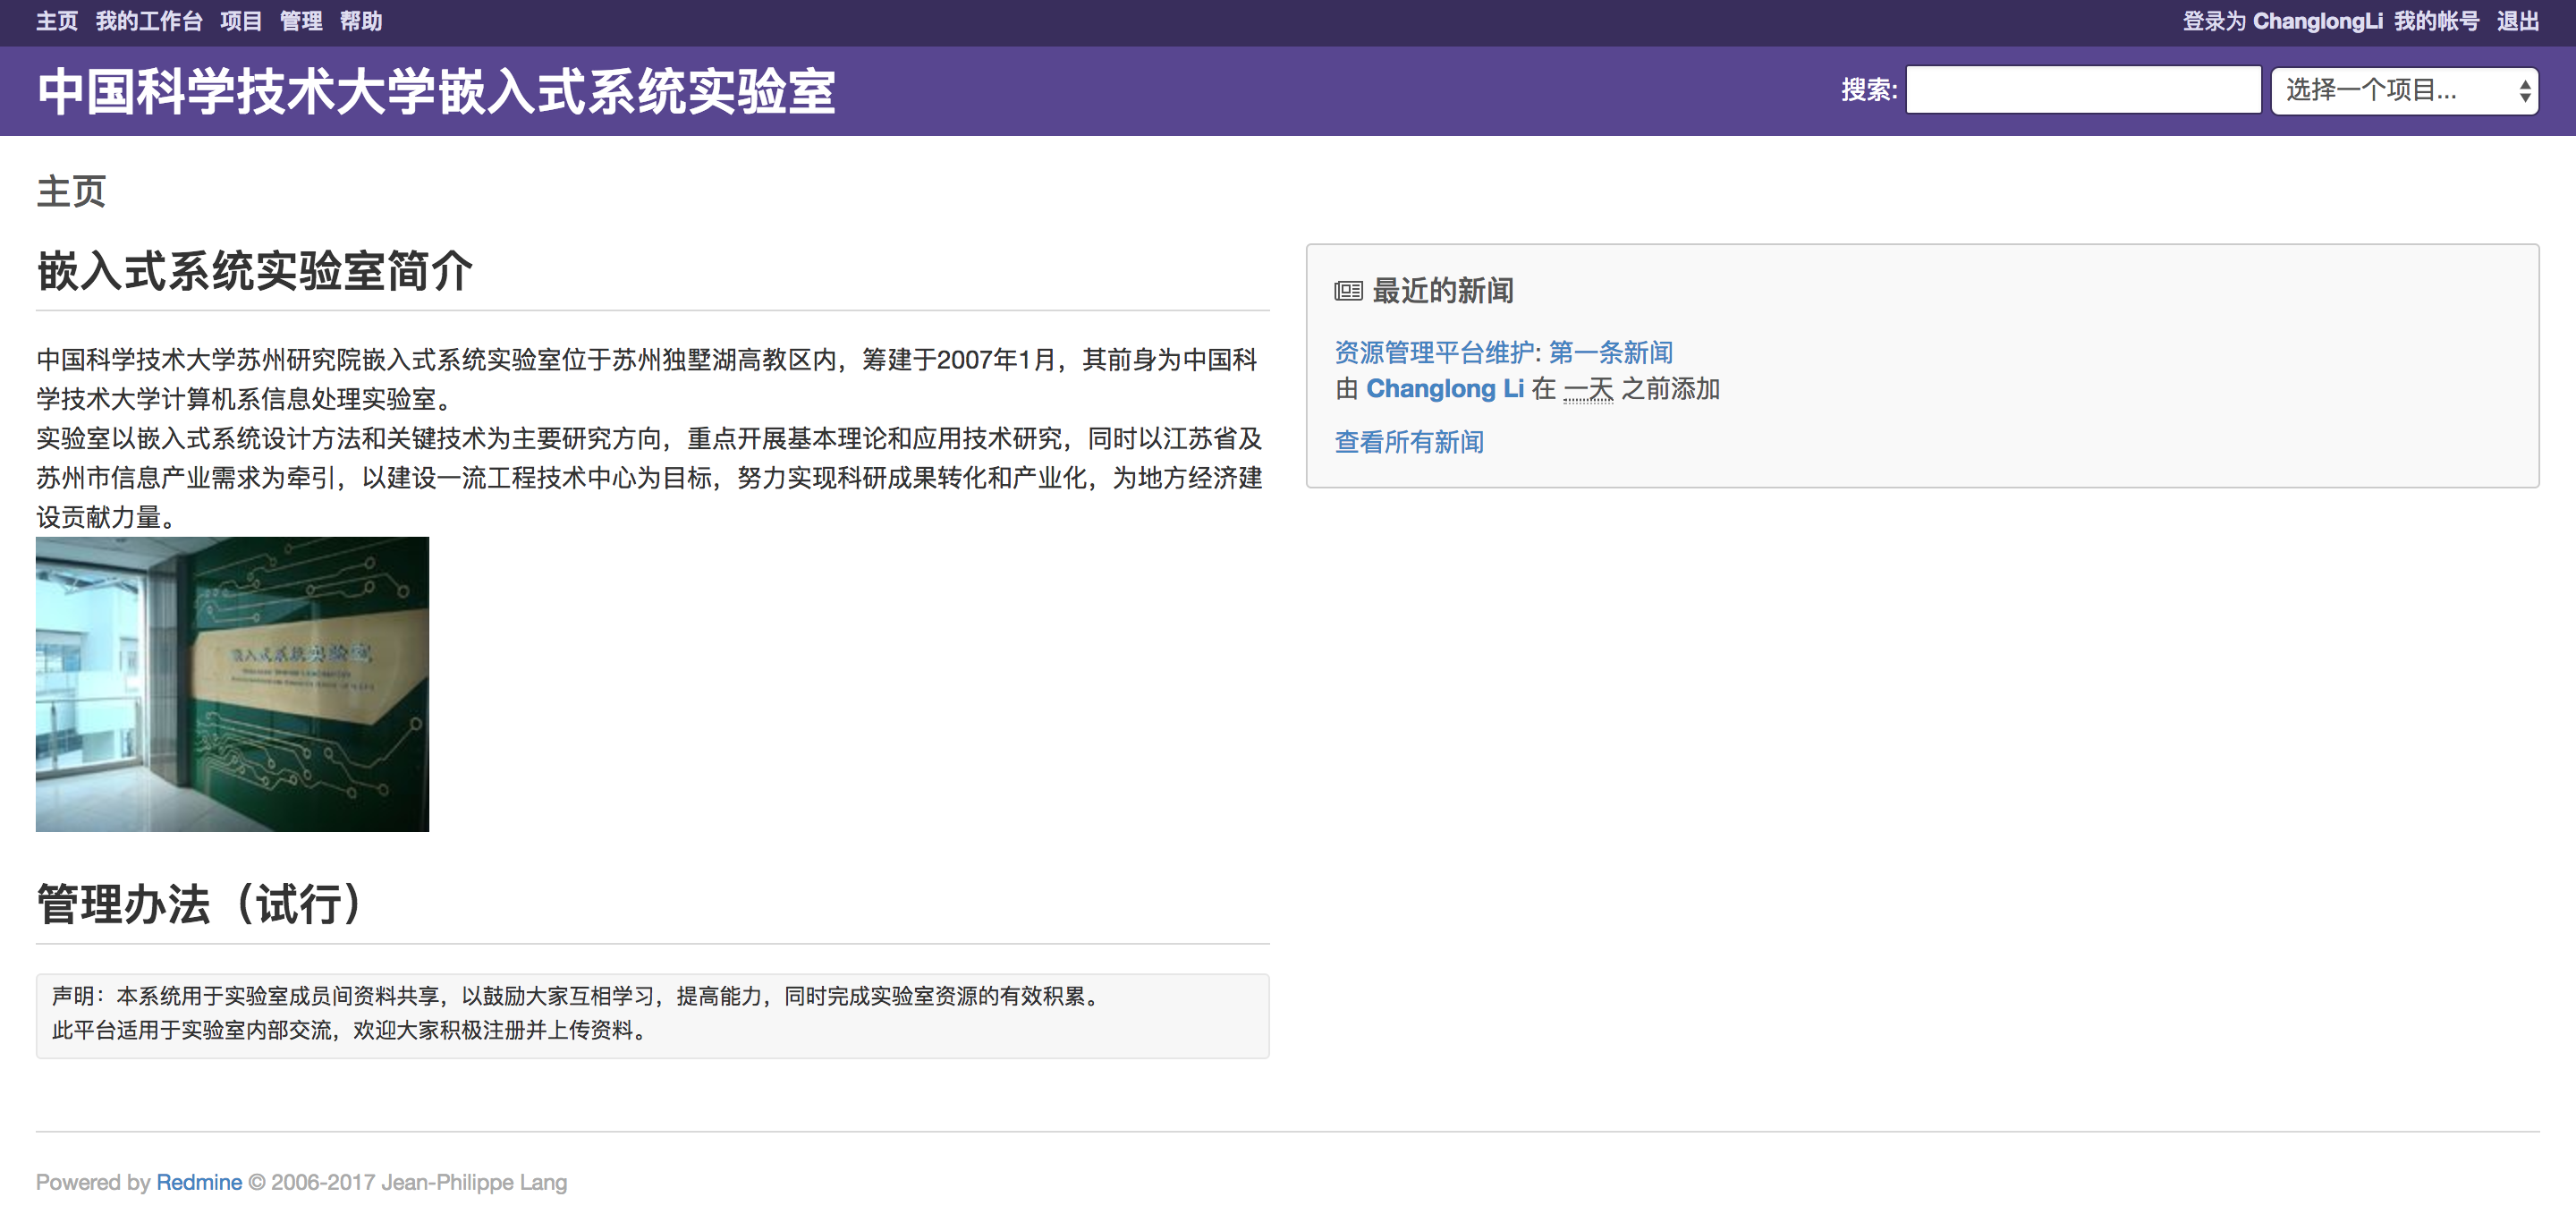
主页界面如[2]所示,它主要负责展示实验室信息;
项目界面如[3]所示,平台的日常管理工作均在此界面下进行;
帮助界面如[4]所示,官方提供了详细的说明文档;
登录和注册界面如[5]和[6]所示,用户可在此登录或注册账号。
二.项目管理
平台以项目的形式实现对资料的管理,用户登录后,点击页面左上角的“项目”按钮即可访问该账户权限范围内的所有项目。
注意,不同用户所能看到的项目视图以及能够执行的操作是不同的。
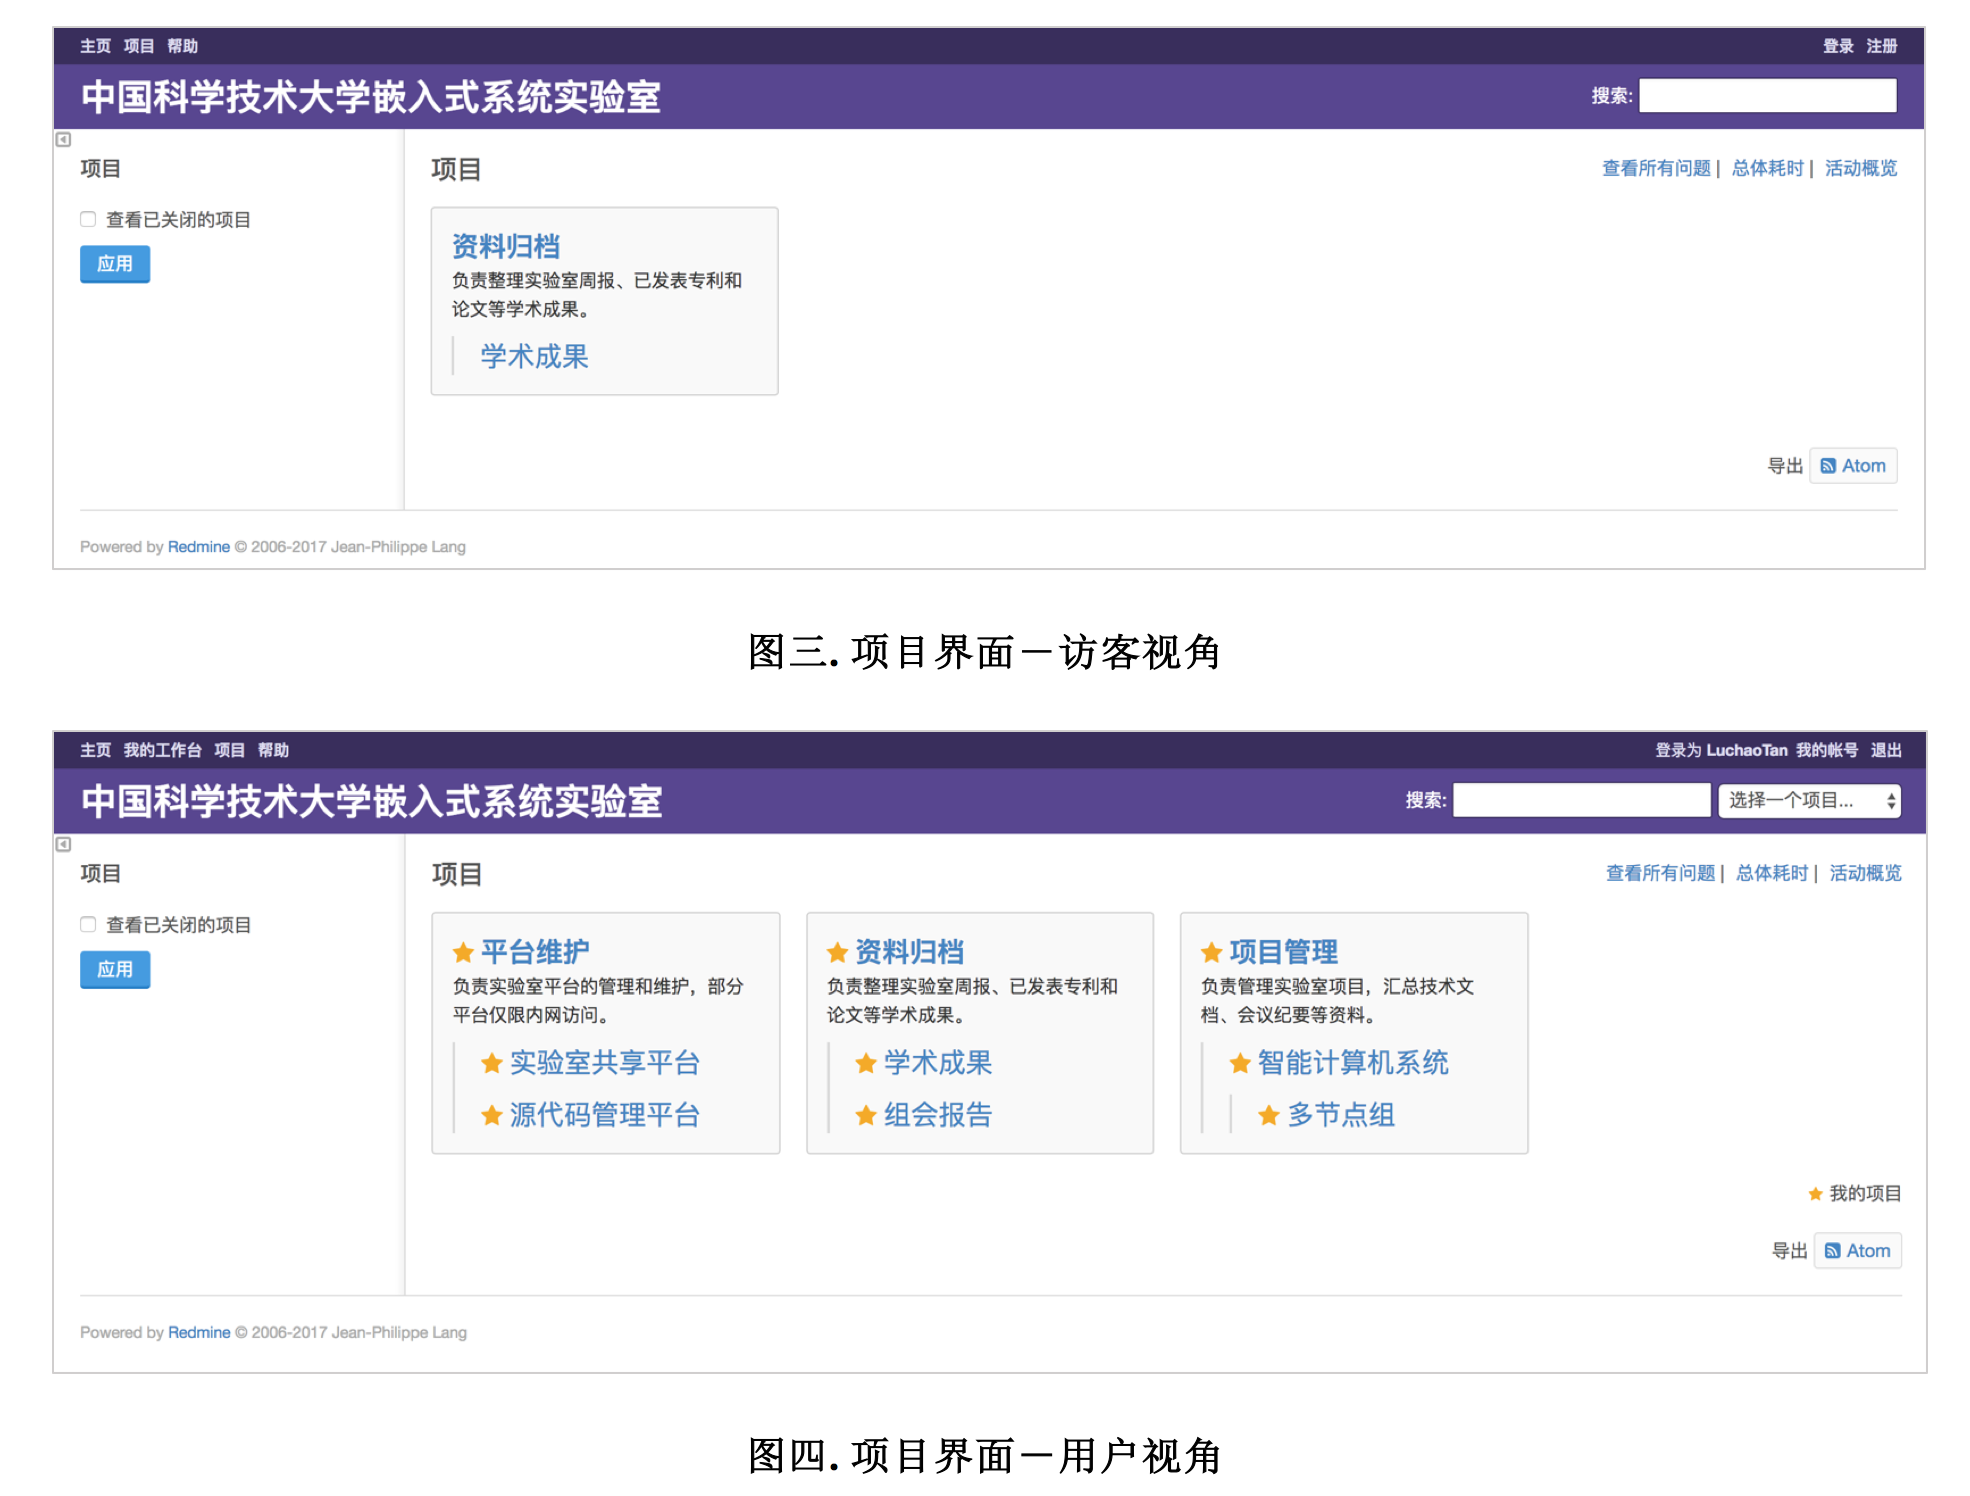
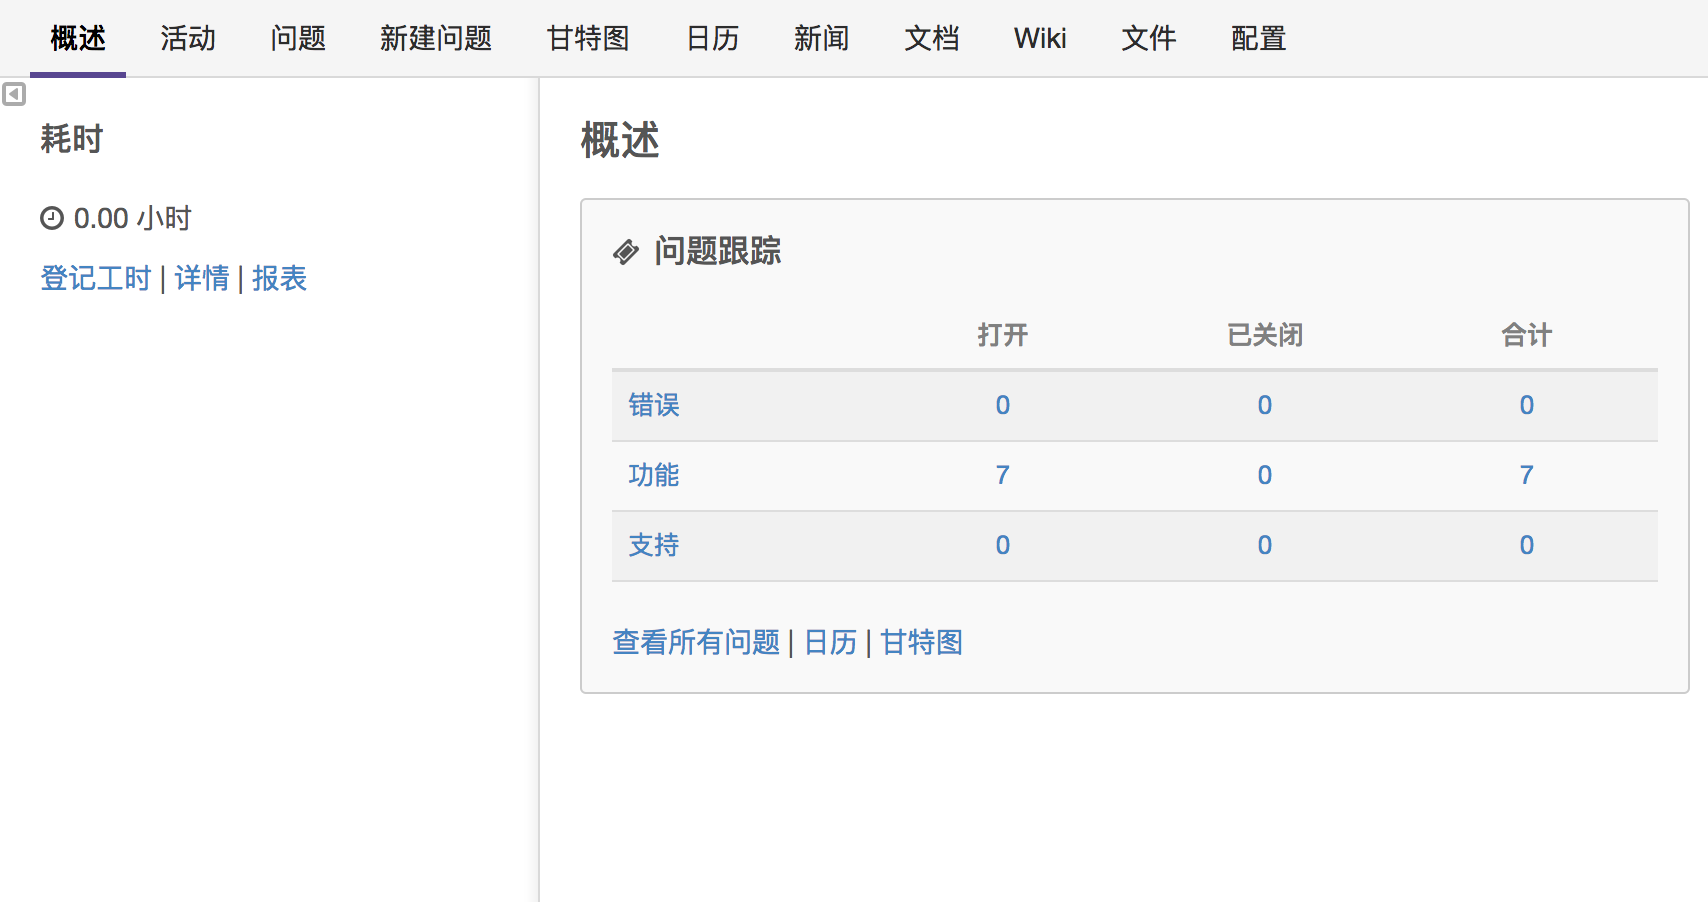
用户登录后,只需进入某个项目,即可基于该项目完成一系列操作,包括“记录活动”、“指派任务”、“发布新闻”、“文档共享”等。
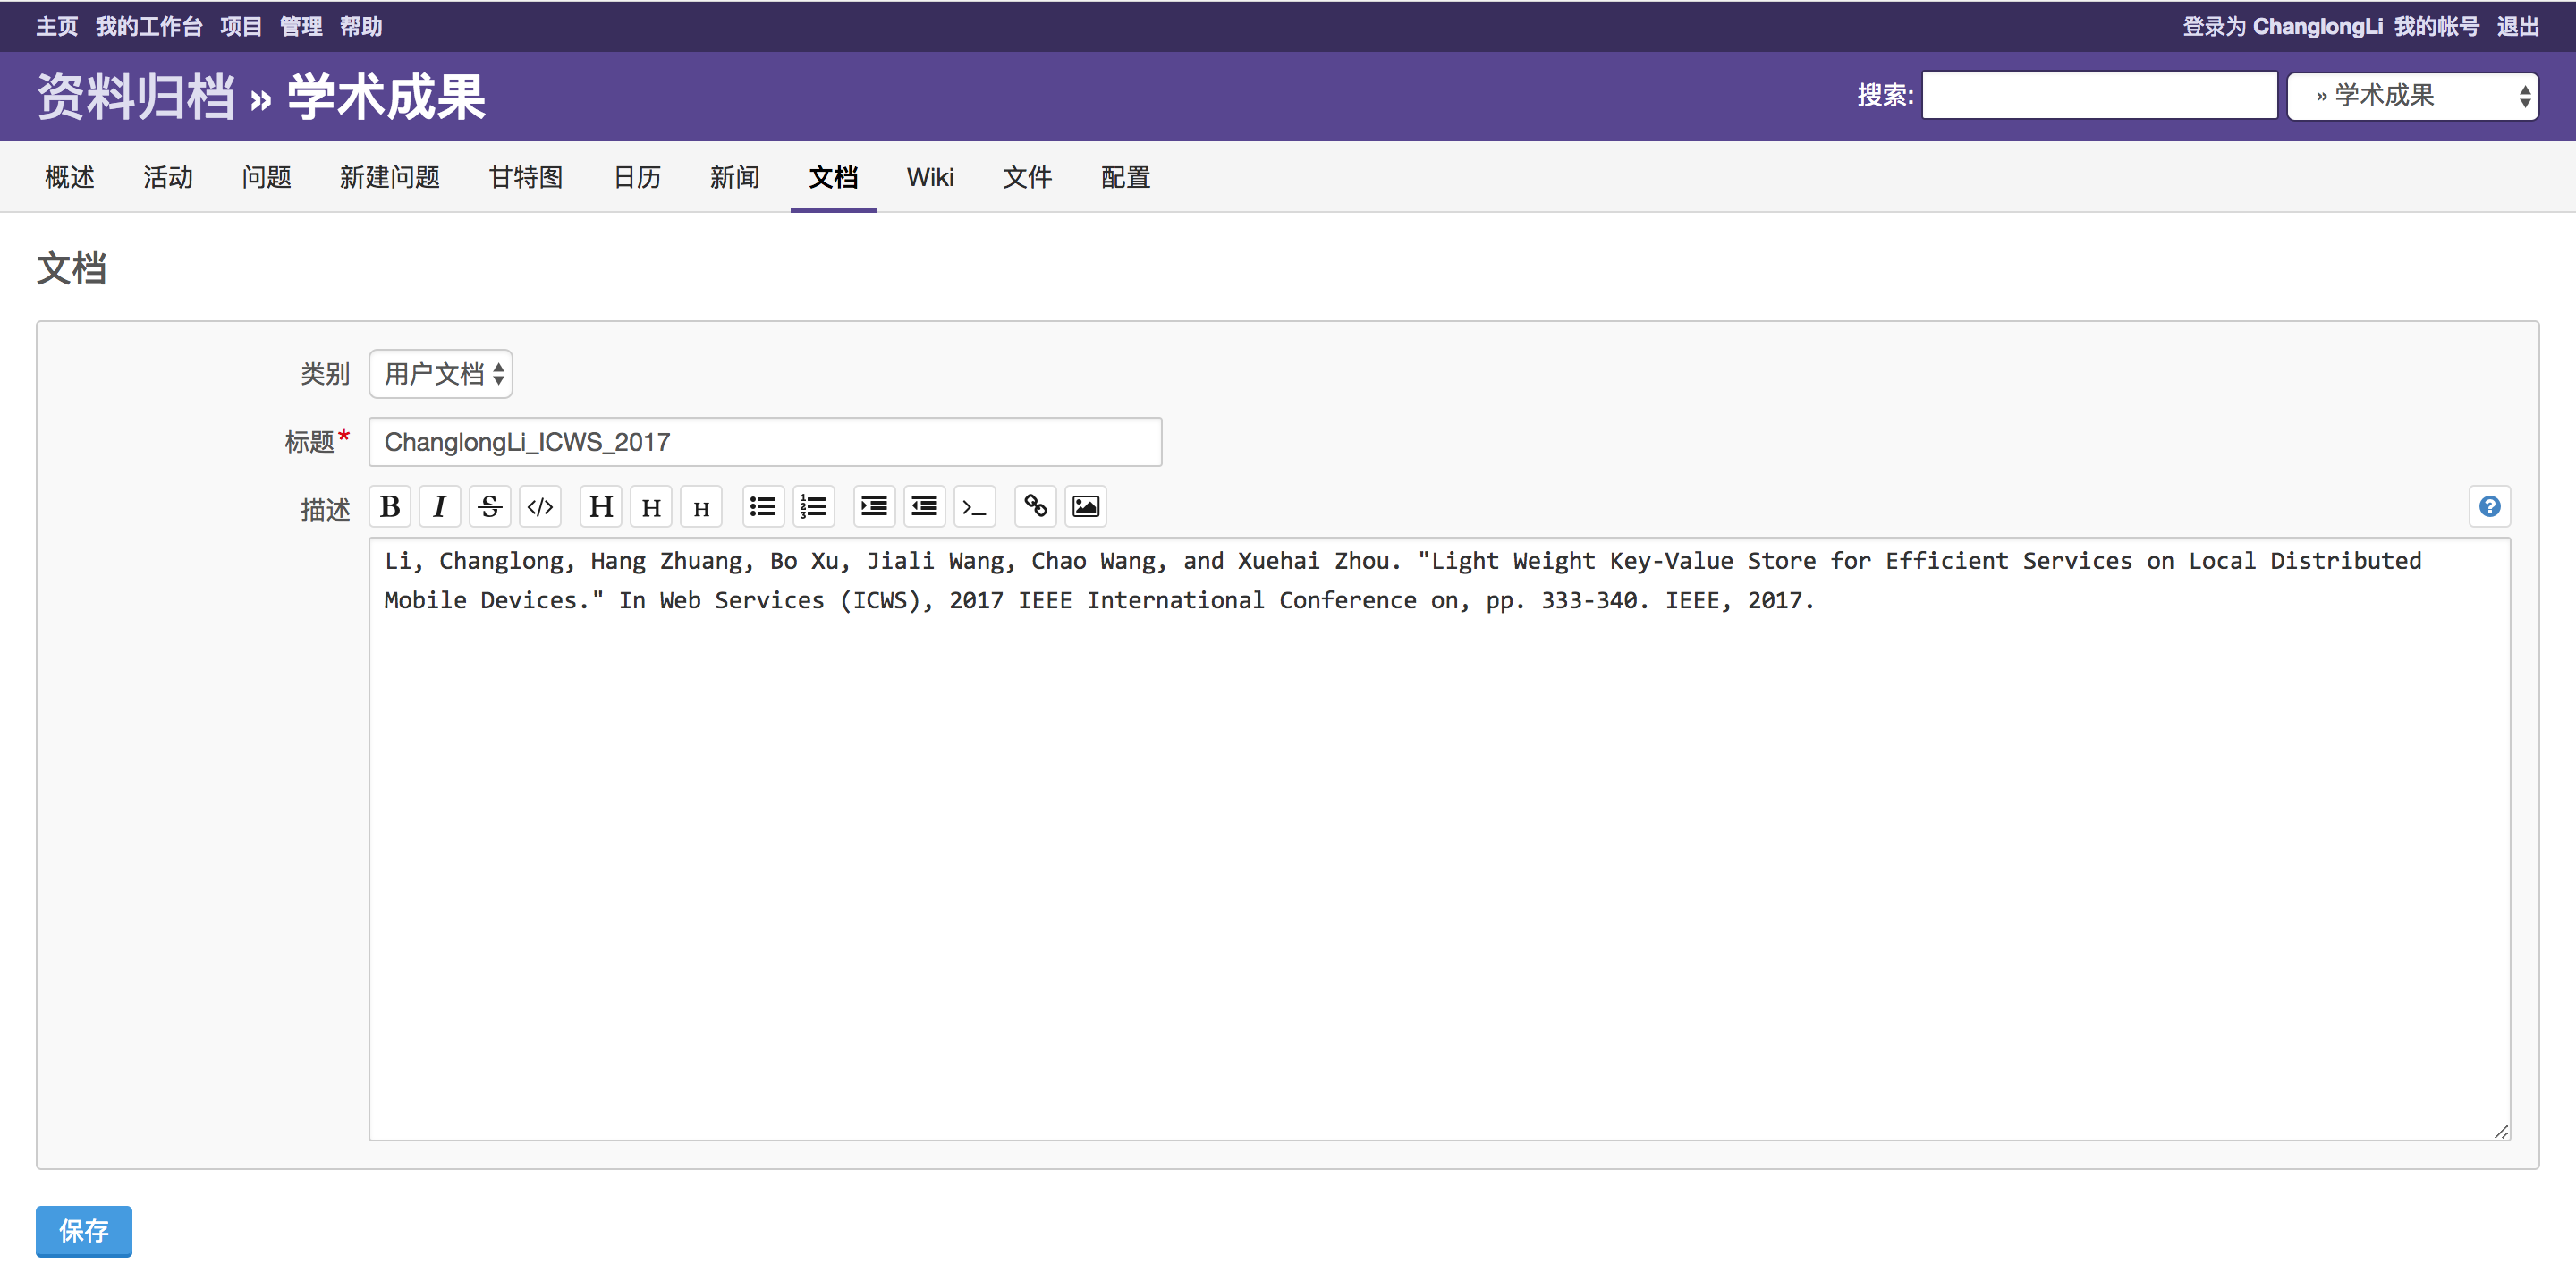
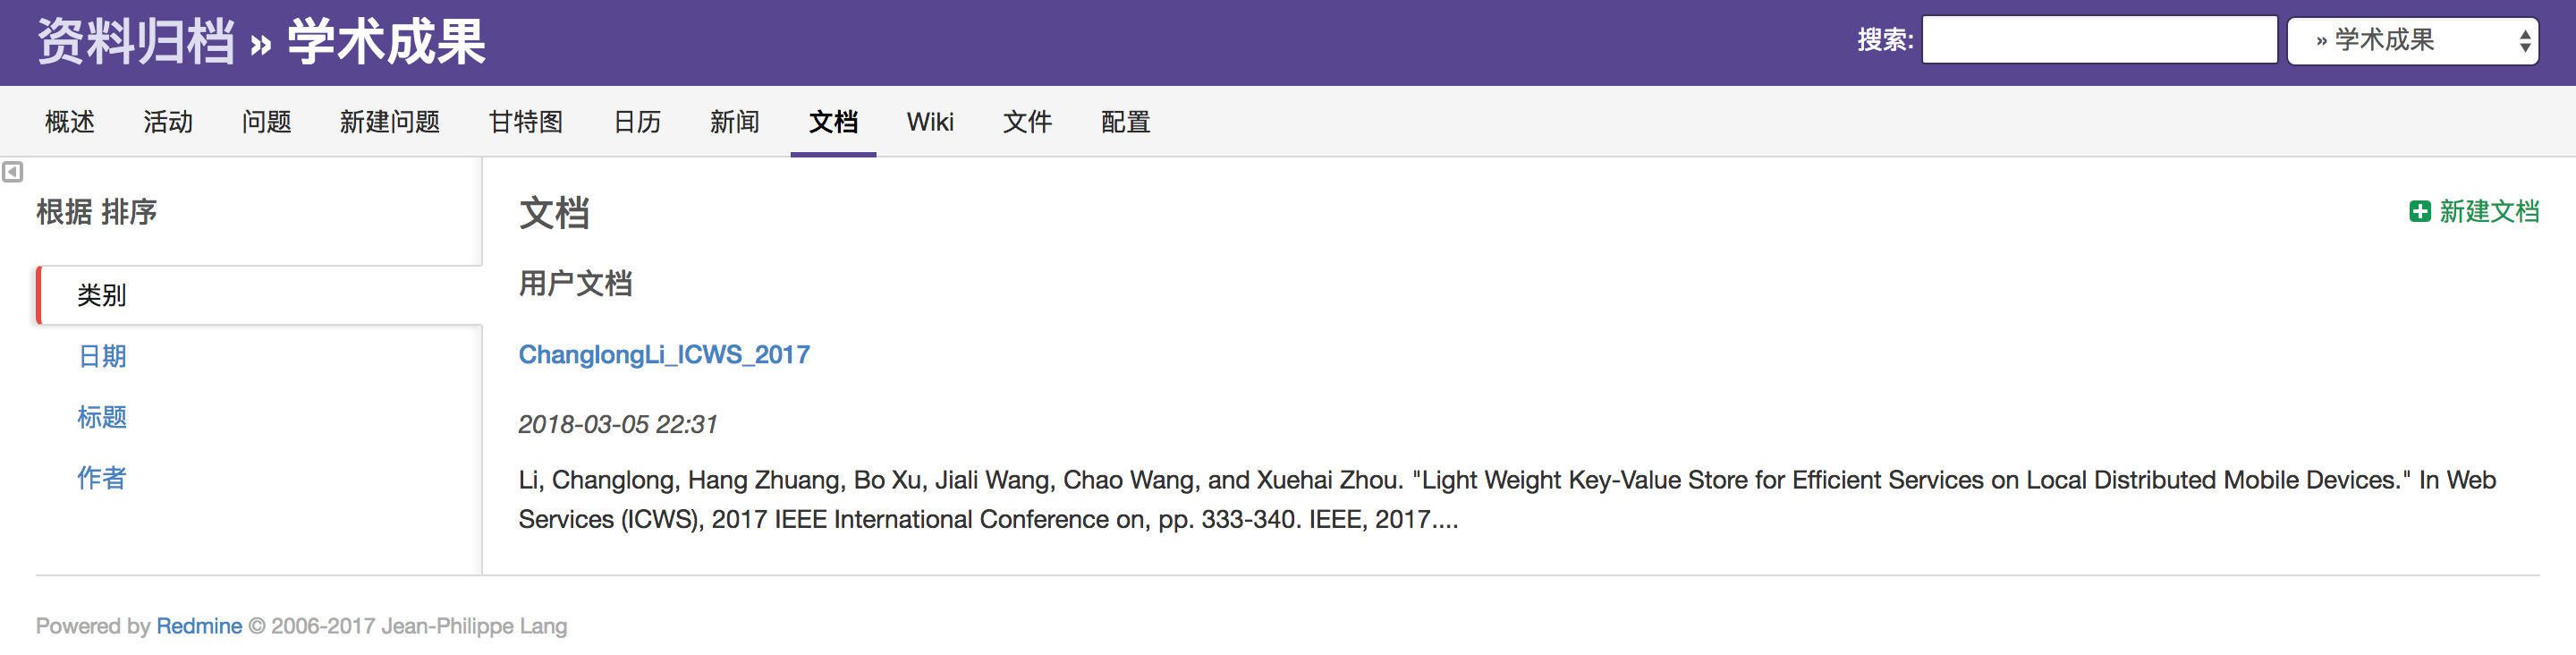
以上传文档为例,在平台项目中,[资料归档]->[学术成果]负责整理和分享实验室成员各学期所发表的学术论文和专利,用户在“文档”目录下可完成附件提交并添加描述。提交时请参考如下格式:
提交后,其他用户即可对该文件进行下载阅读。当然,其他用户不具有删除权限。
其它资料文件(如:工作周报、项目会议纪要等)均可通过上述方式共享。
三.新闻发布
用户可以对所负责项目发布新闻,该新闻可以被项目组内所有成员看到,新闻的编辑页面如下图所示。

用户可以在工作台查看最新发布的新闻。

四.工作进度监管
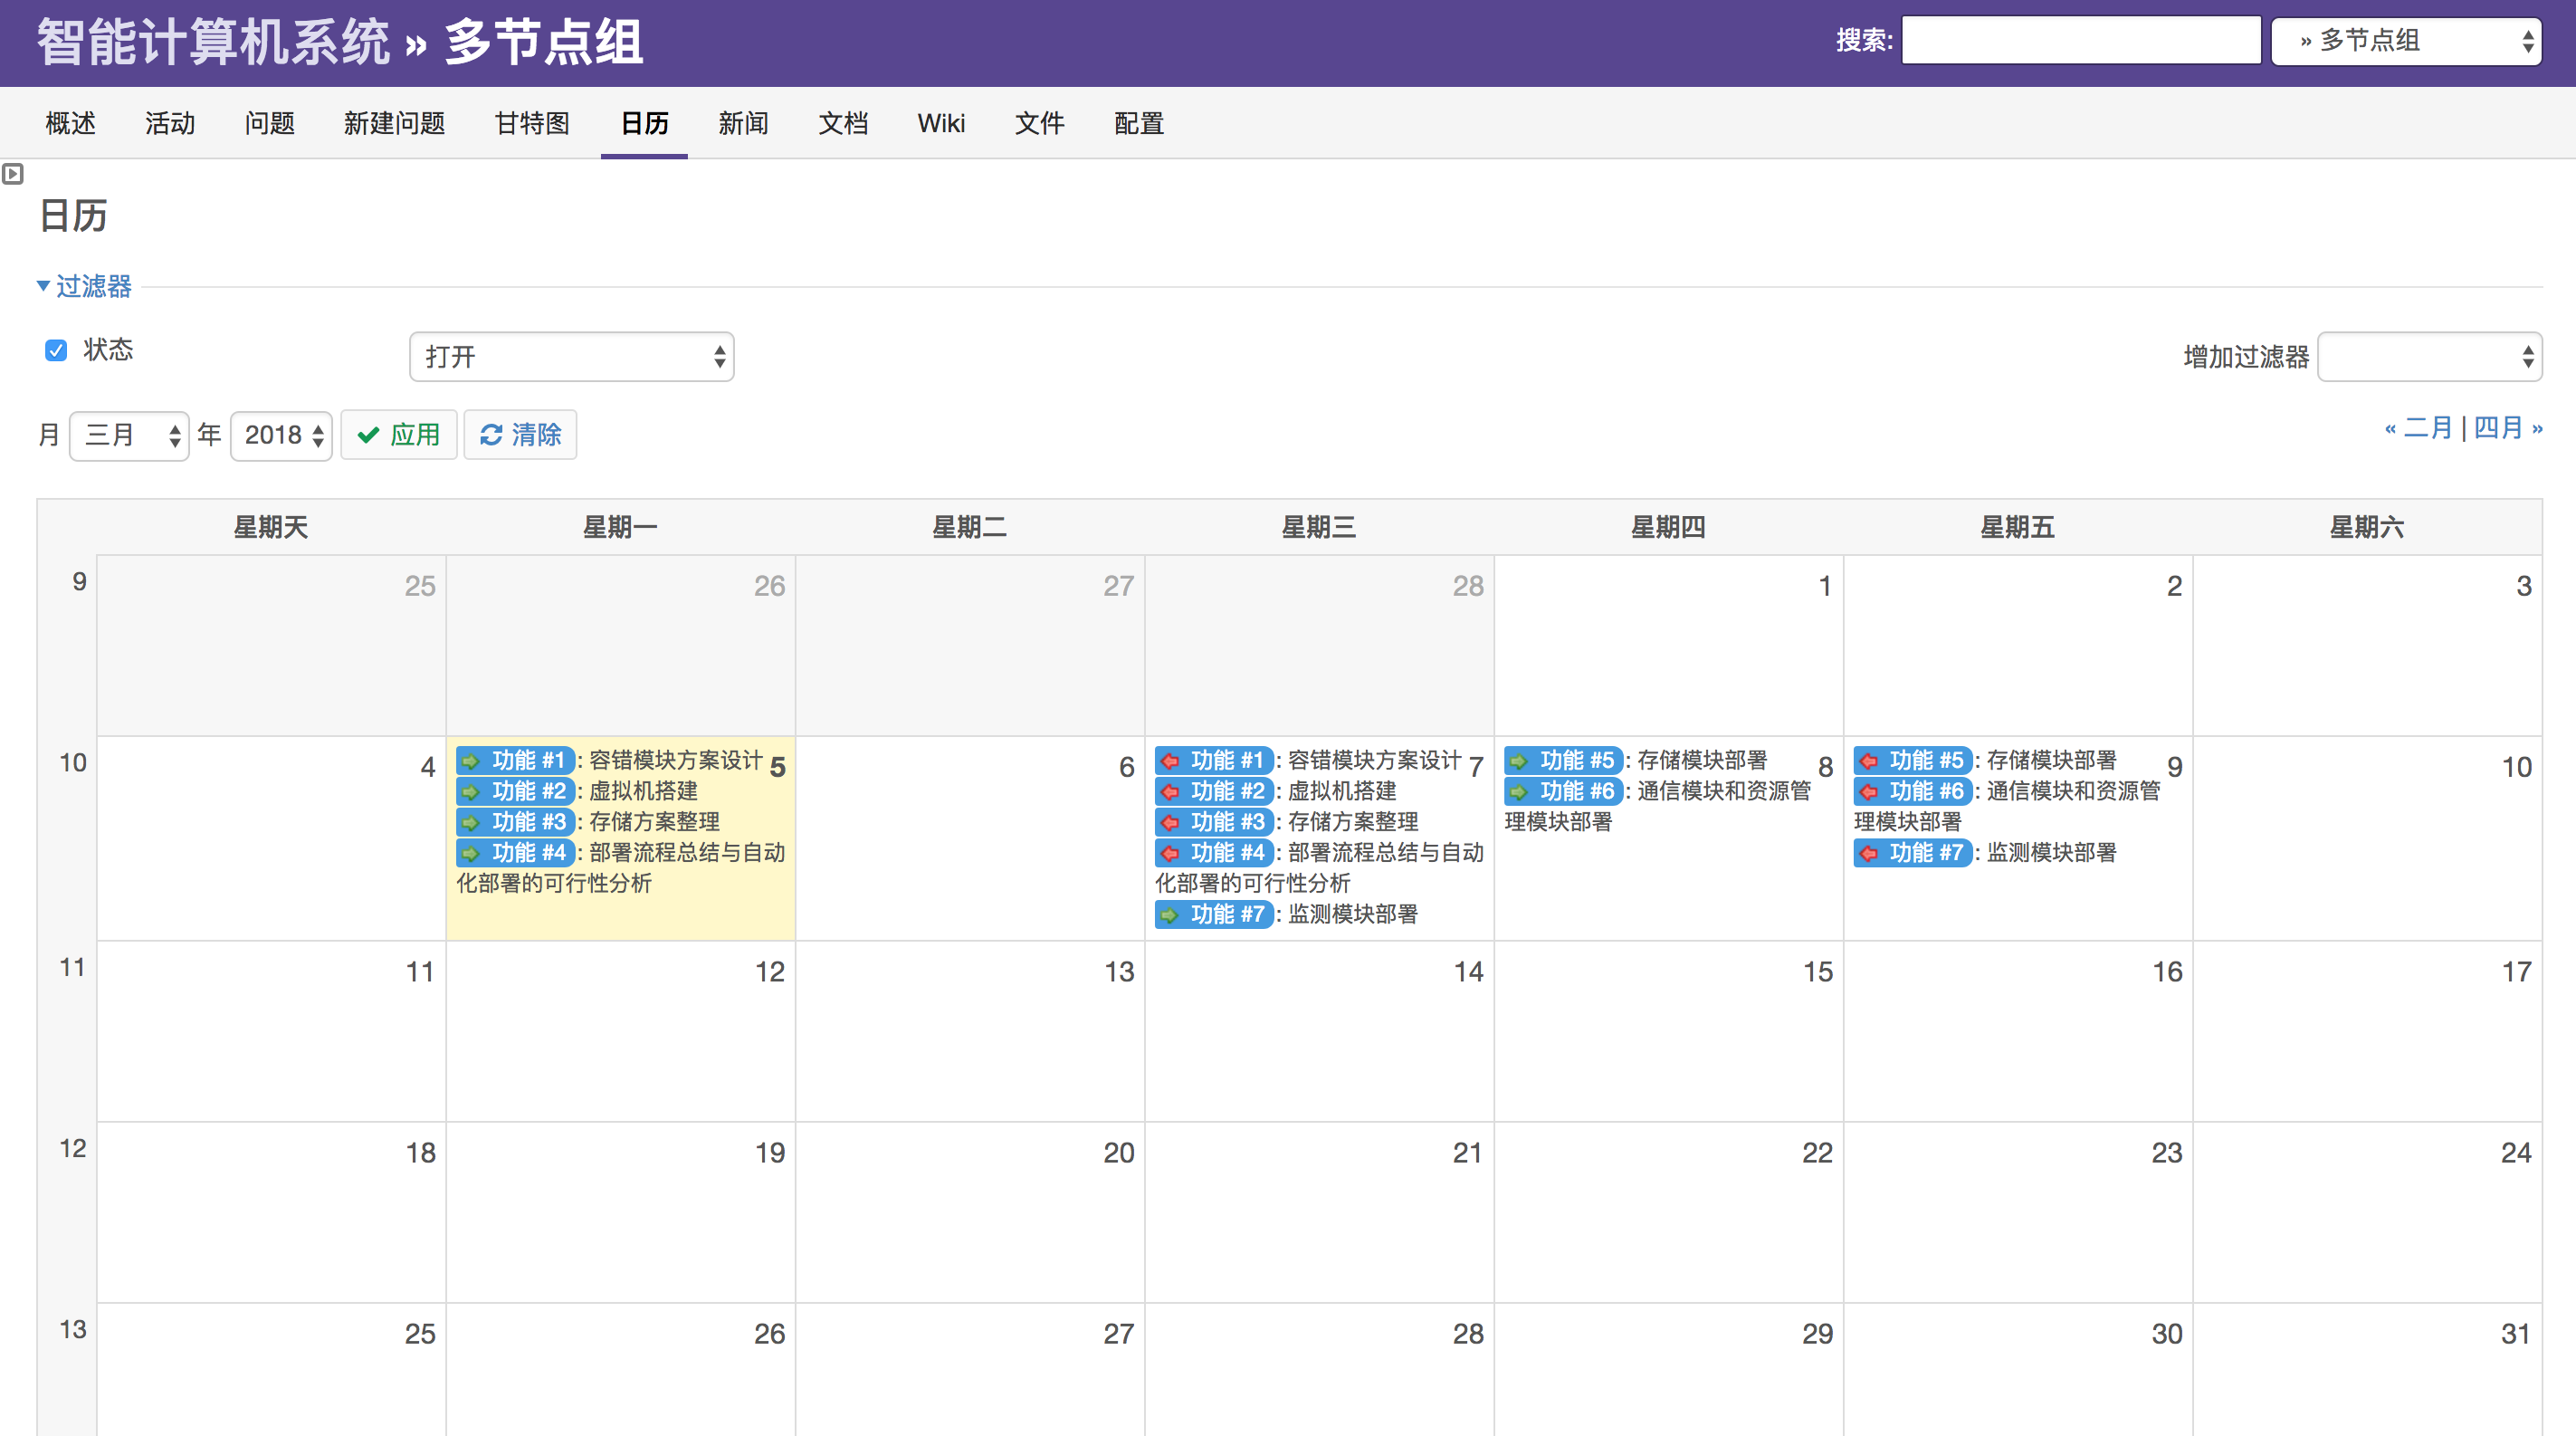
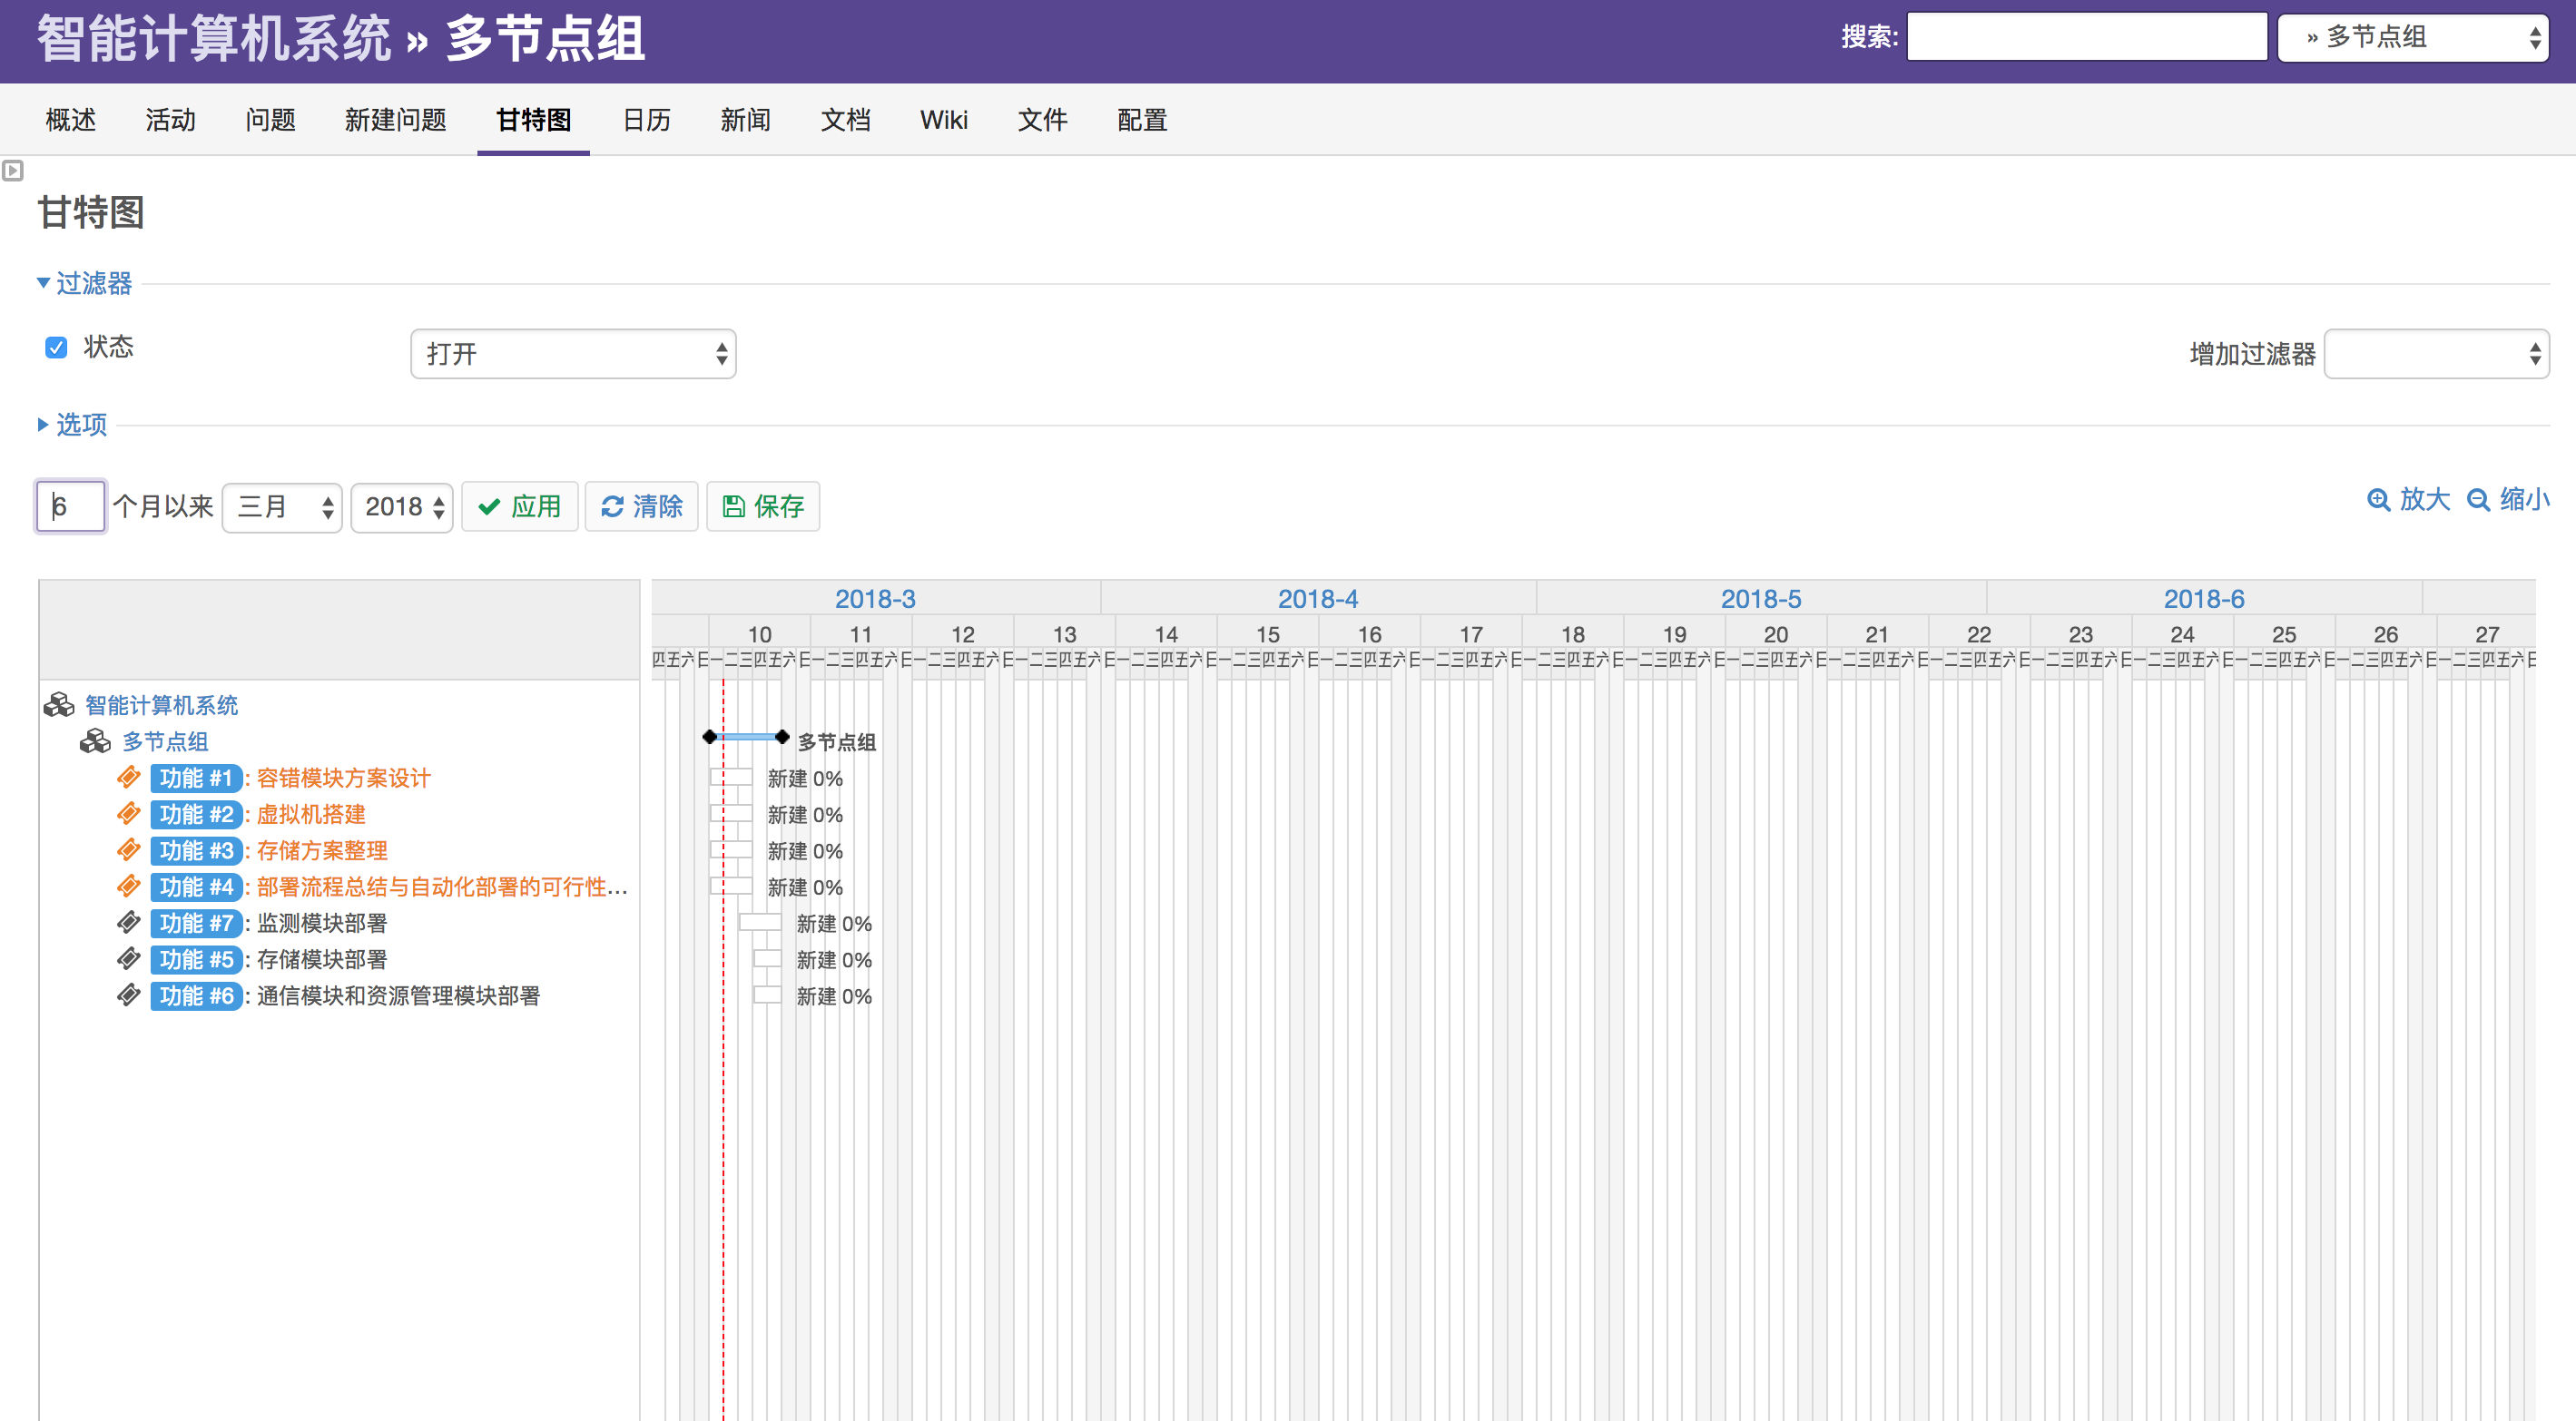
项目管理者可以发布任务,并对任务进行跟踪。通过[项目]->[新建问题]可以完成一次任务的发布,具体包括“任务内容”、“任务指派对象”、“开始日期”、“计划完成日期”、“跟踪者”等。被指派任务的用户在登录平台后即可在“我的工作台”看到。
被指派的任务同样体现在日历和甘特图中。
五.我的工作台
[我的工作台]是在用户登录后才会出现的菜单项,在该界面中,用户可以编辑个人空间,添加或删除功能模块。
管理篇
管理员在主菜单中,除了“主页”、“我的工作台”、“项目”外,额外会出现一个“管理”菜单,管理员可以在这里对平台进行管理。
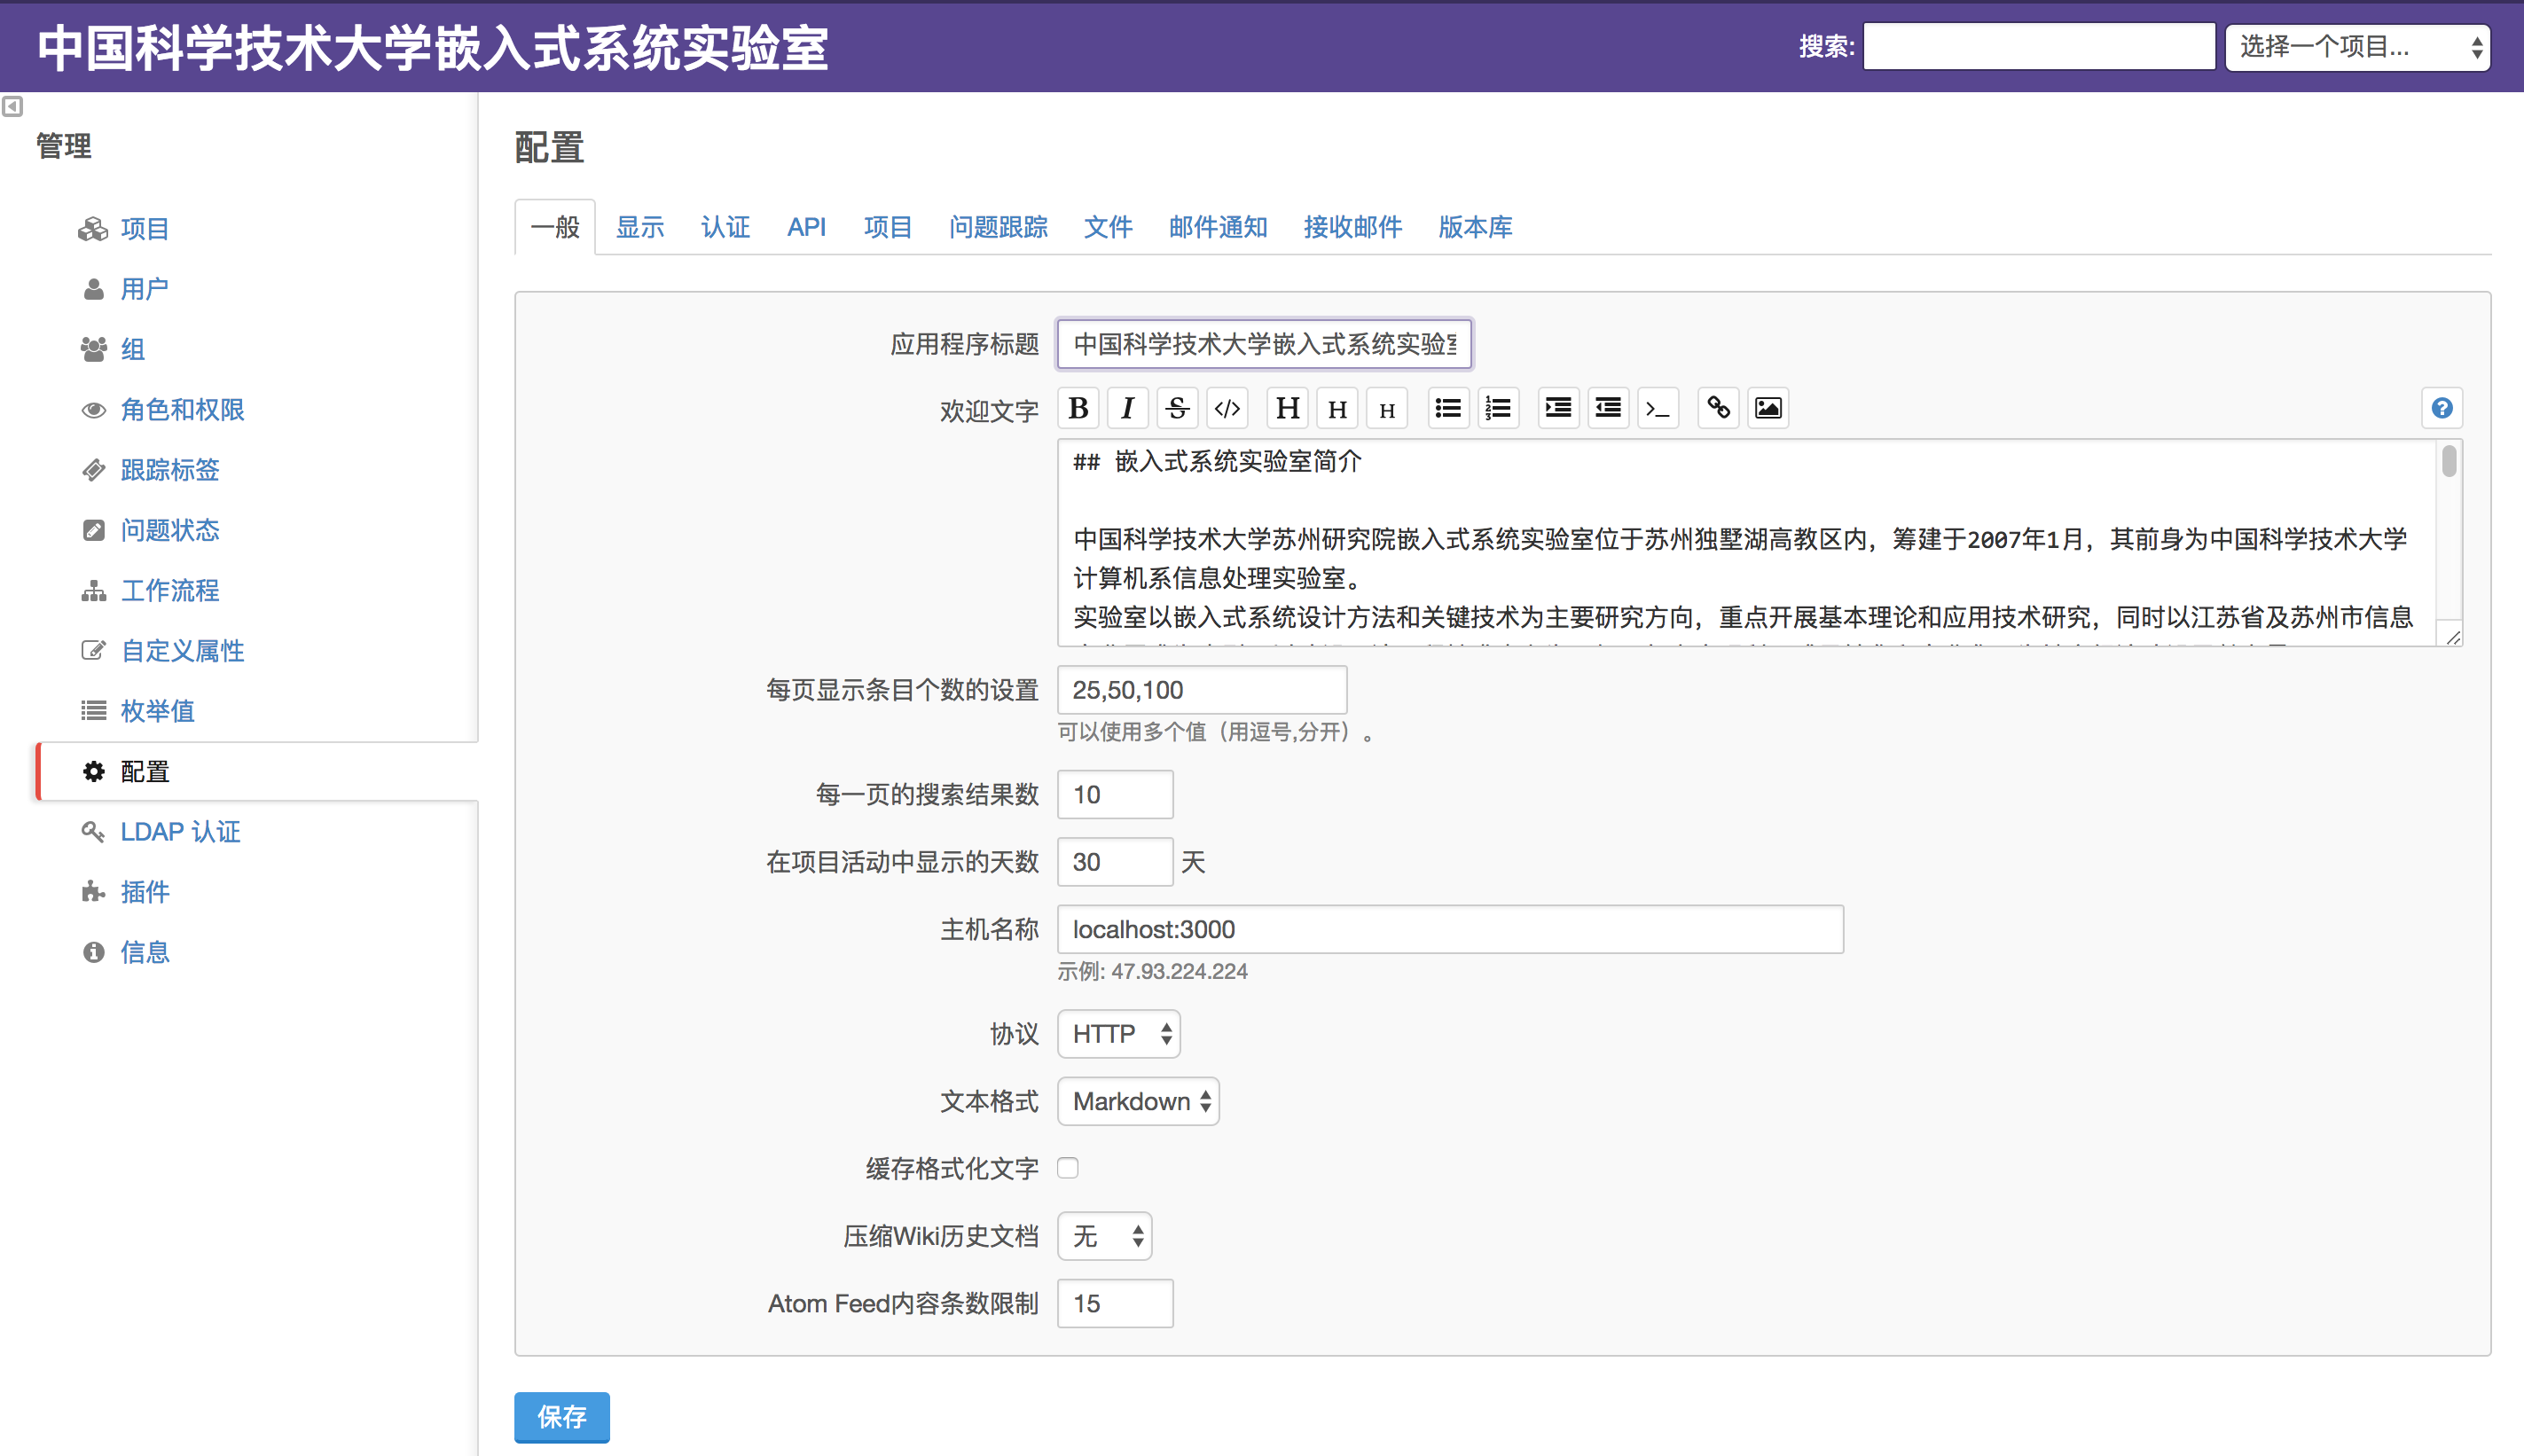
一.主页维护与主题设置
对平台主页的维护和主题的选择可以通过管理界面中的“配置”进行管理,具体如下图所示:
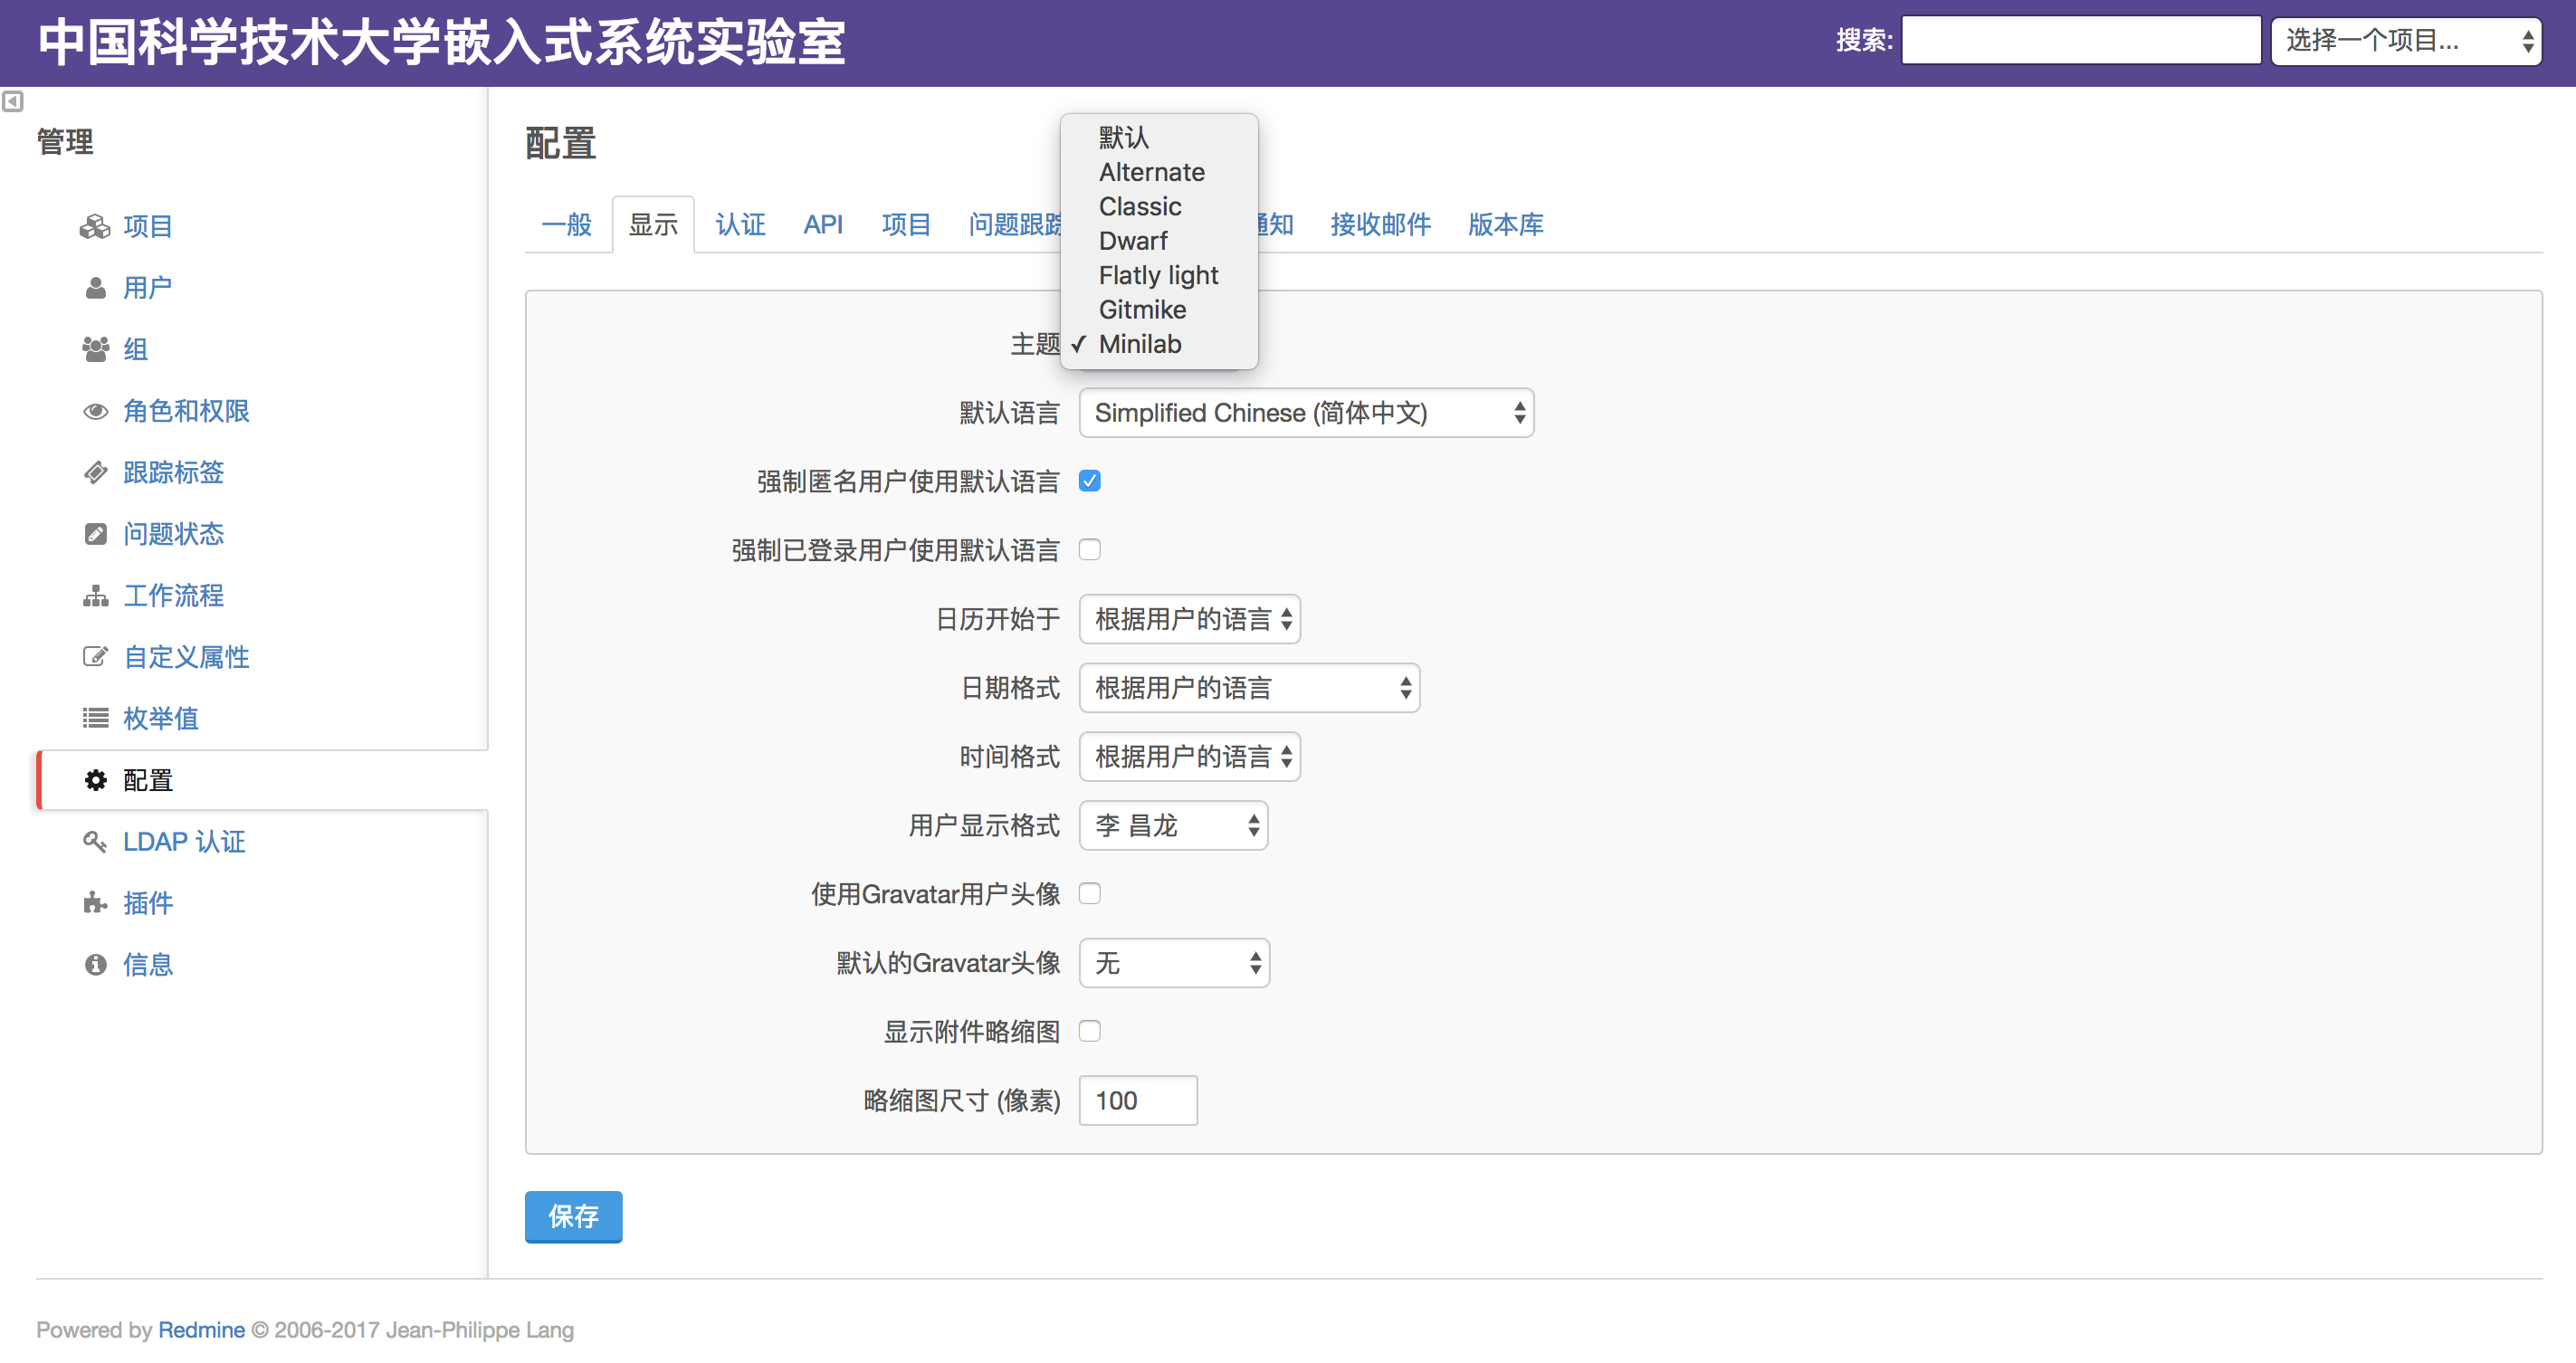
注意,这里有Classic、Dwarf等多个主题,主题在后台位于“/var/www/redmine/public/themes”目录下,管理员可以根据需要在网上下载更多的主题。
Redmine为用户提供了丰富的主题素材,大家可以自主的进行下载,并将下载后的主题(文件夹)通过scp命令拷贝到平台服务器的/var/www/redmine/public/themes目录下即可。
主题下载地址:http://www.redminethemes.org/
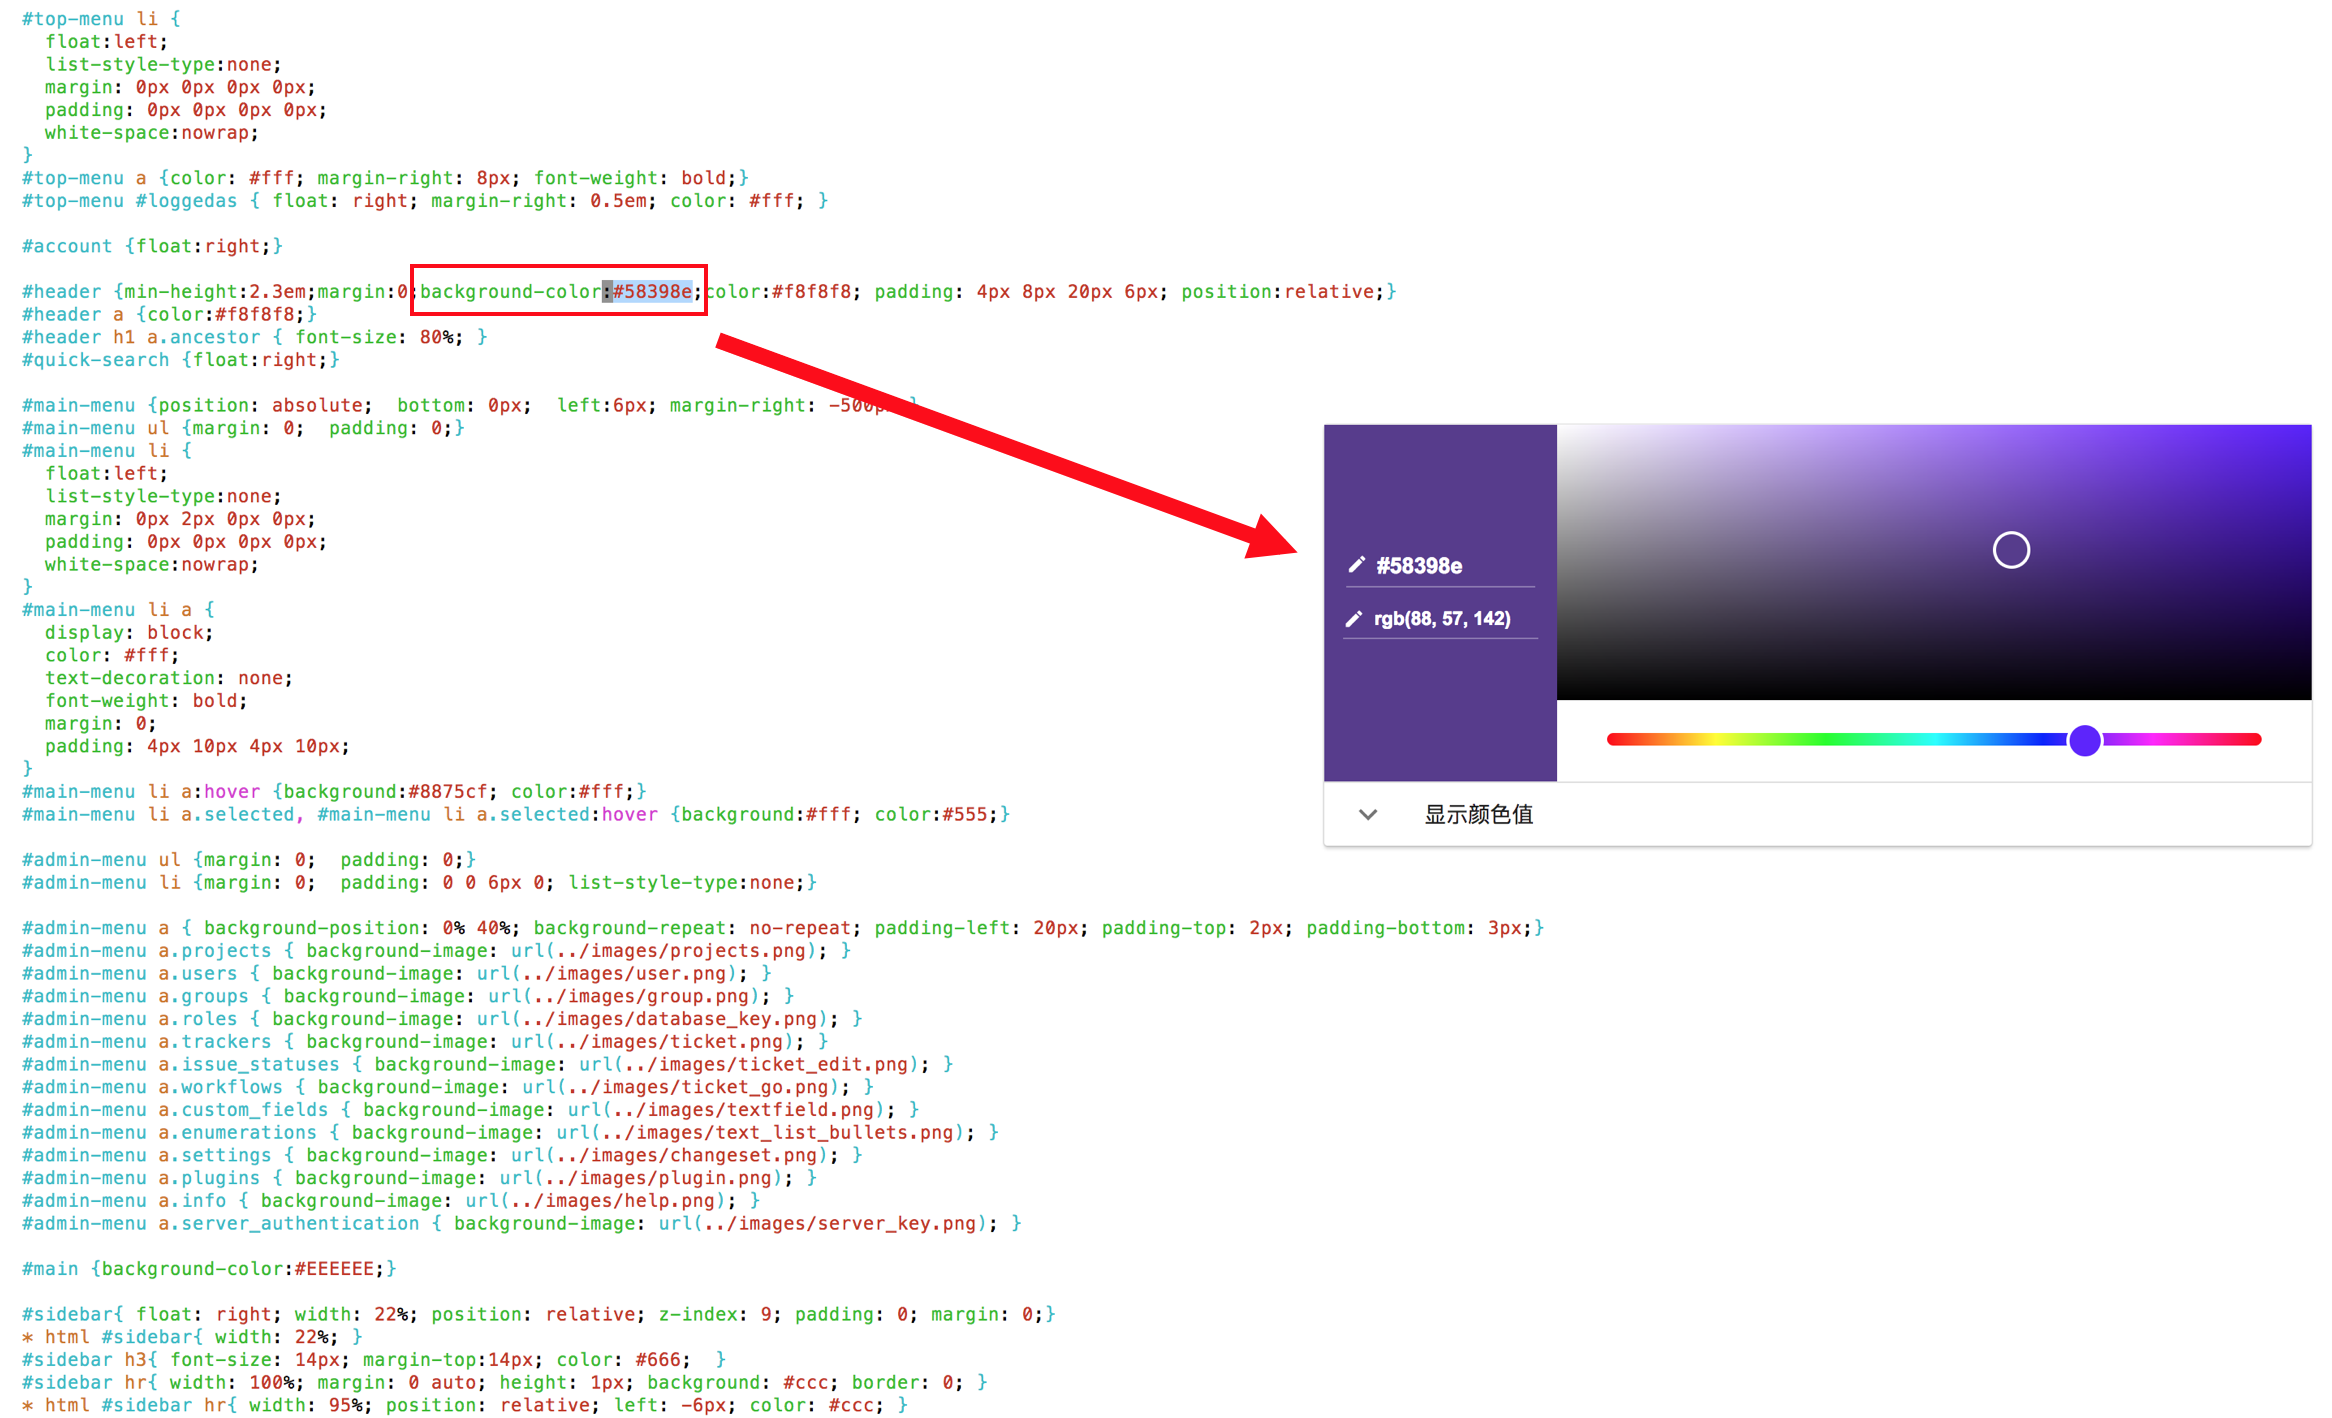
当然,也可以对主题中的背景色调进行微调,只需修改配置文件中“#58398e”等数据即可。
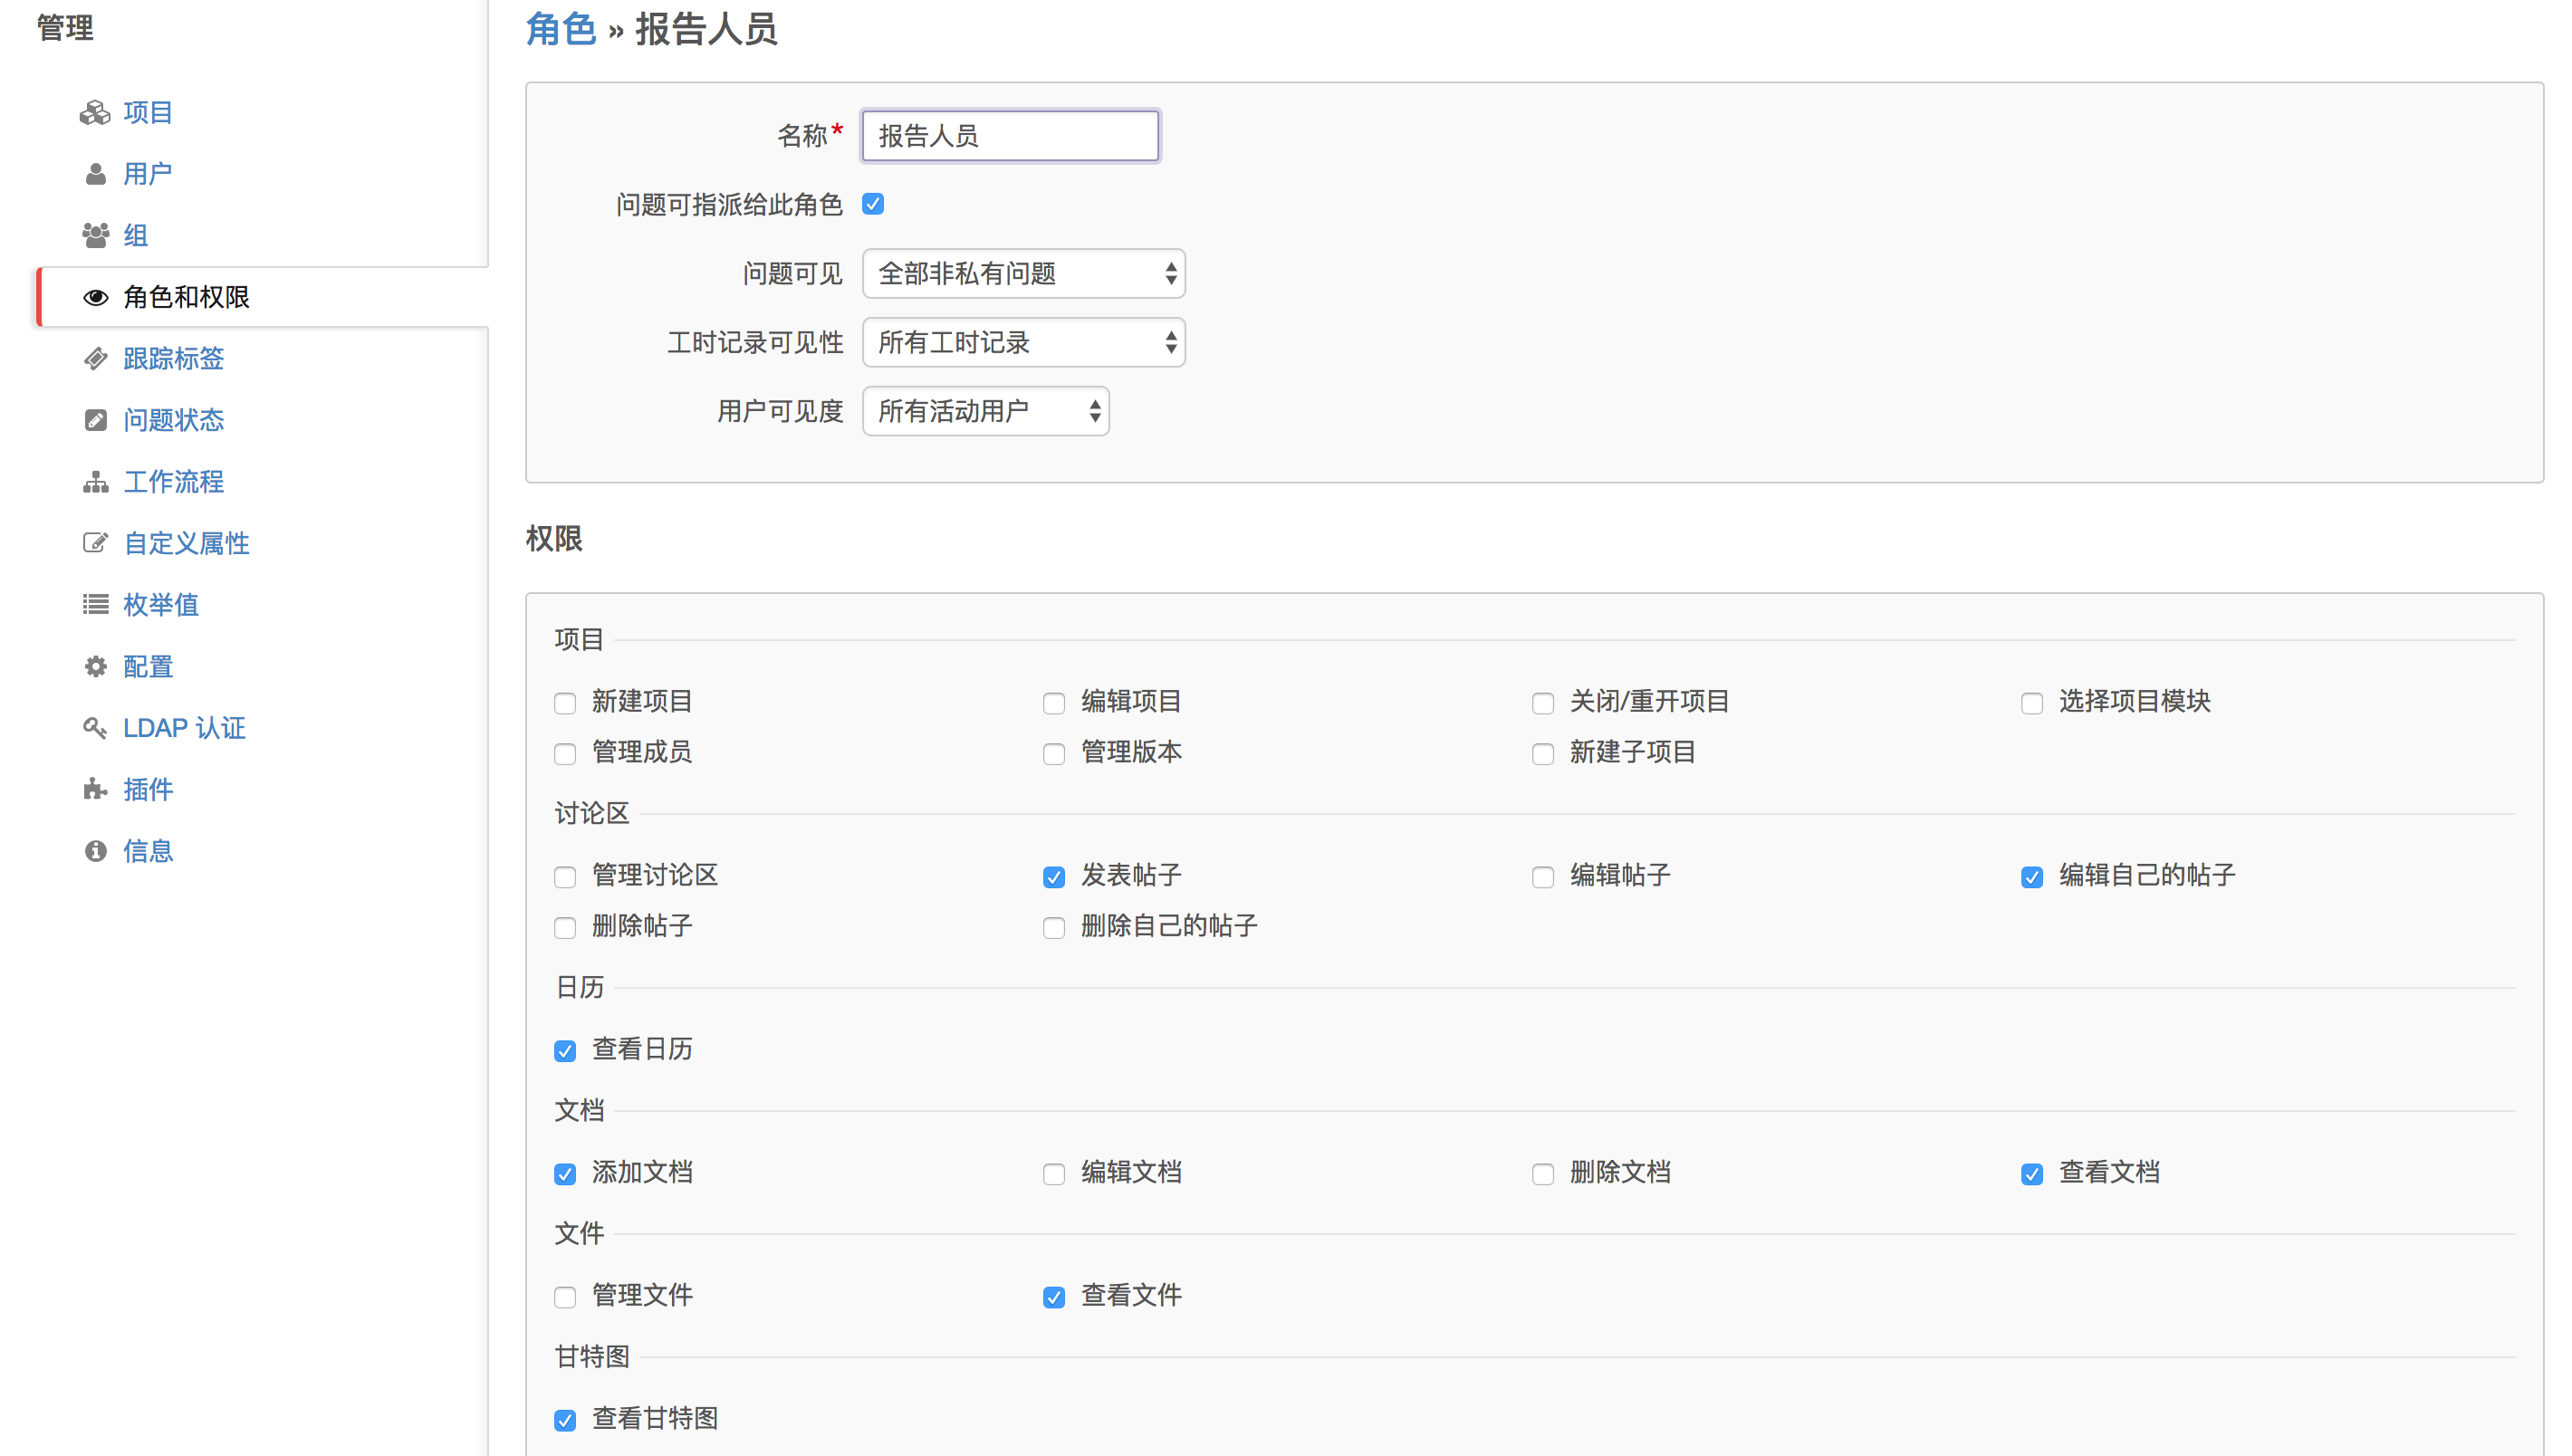
二.用户权限控制
管理员可以对用户赋予不同权限,如“管理人员”、“开发人员”、“报告人员”等,不同人员所具备的权限也完全可定制化。
本平台对用户的“删除”权限进行了较严格的限定,一般情况下,用户仅可以上传资料,而对文档或项目的删除操作则是不被允许的。
部署篇
一. 安装依赖软件
注意,本平台部署于Ubuntu-16.04系统之上,所有操作请在root权限下操作。
$ sudo su root
$ apt update
$ apt upgrade
$ apt install mysql-server mysql-client libmysqlclient-dev imagemagick libmagickwand-dev libcurl4-openssl-dev git-core subversion build-essential
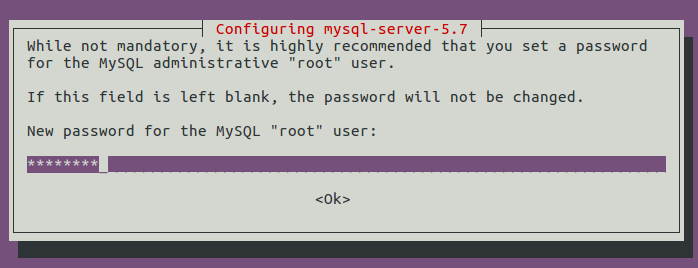
安装过程中需要设置Mysql的root用户密码:
二. 安装Redmine
下载Redmine源码:
$ mkdir -p /var/www/
$ cd /var/www/
$ svn co https://svn.redmine.org/redmine/branches/3.2-stable redmine
创建配置文件:
$ cd redmine
$ cp config/configuration.yml.example config/configuration.yml
$ cp config/database.yml.example config/database.yml
配置数据库连接信息:
$ vim config/database.yml
production:
adapter: mysql2
database: redmine
host: localhost
username: redmine
password: "test1234"
encoding: utf8
更改目录权限:
$ mkdir -p tmp tmp/pdf public/plugin_assets
$ chown -R www-data:www-data files log tmp public/plugin_assets
$ chmod -R 775 files log tmp public/plugin_assets
三. 安装Ruby
RVM是Ruby enVironment Manager的简写,是一个非常好ruby版本管理和安装工具。
导入RVM公共密钥:
$ curl -sSL https://rvm.io/mpapis.asc | sudo gpg2 --import -
注意,系统可能提示找不到gpg2命令,不要慌,只需要按系统提示apt install安装相关依赖就好。
接下来下载RVM的安装脚本并执行:
$ curl -sSL https://get.rvm.io | bash -s stable
设置RVM环境变量:
$ source /usr/local/rvm/scripts/rvm
安装RVM依赖:
$ rvm requirements
安装Ruby;列出可用的Ruby版本:
$ rvm list known
选择合适的版本进行安装,这里我们选用的是2.3.0,请主要版本间的依赖关系:
$ rvm install 2.3.0
设置Ruby默认使用的版本:
$ rvm use 2.3.0 --default
查看Ruby版本:
$ ruby -v
四. 为Redmine创建数据库
mysql -u root -p
这是以root用户登录,密码就是上面安装时输入的那个。
对数据库操作如下:
CREATE DATABASE redmine CHARACTER SET utf8mb4;
CREATE USER 'redmine'@'localhost' IDENTIFIED BY 'my_password';
GRANT ALL PRIVILEGES ON redmine.* TO 'redmine'@'localhost';
如果mysql版本号在5.5.2以下,将utf8mb4改成utf8即可:
CREATE DATABASE redmine CHARACTER SET utf8;
CREATE USER 'redmine'@'localhost' IDENTIFIED BY 'my_password';
GRANT ALL PRIVILEGES ON redmine.* TO 'redmine'@'localhost';
上面SQL语句创建了一个叫redmine的数据库和redmine用户(密码”my_password”)。
五. 安装Nginx和Phusion Passenger
安装Passenger:
$ gem install passenger --no-ri --no-rdoc
编译安装Nginx:
(这一步很吃内存,内存空间至少2GB,推荐4GB或以上)
> passenger-install-nginx-module

Welcome to the Phusion Passenger Nginx module installer, v5.0.30.

This installer will guide you through the entire installation process. It
shouldn't take more than 5 minutes in total.

Here's what you can expect from the installation process:

1. This installer will compile and install Nginx with Passenger support.
2. You'll learn how to configure Passenger in Nginx.
3. You'll learn how to deploy a Ruby on Rails application.

Don't worry if anything goes wrong. This installer will advise you on how to
solve any problems.

Press Enter to continue, or Ctrl-C to abort.  # 回车

--------------------------------------------

Which languages are you interested in?

Use <space> to select.
If the menu doesn't display correctly, press '!' # 选择Ruby和Python

‣ ⬢  Ruby
⬢  Python
⬡  Node.js
⬡  Meteor
--------------------------------------------

Checking for required software...

* Checking for C compiler...
Found: yes
....
--------------------------------------------

Automatically download and install Nginx?

Nginx doesn't support loadable modules such as some other web servers do,
so in order to install Nginx with Passenger support, it must be recompiled.

Do you want this installer to download, compile and install Nginx for you?

1. Yes: download, compile and install Nginx for me. (recommended)
The easiest way to get started. A stock Nginx 1.10.1 with Passenger
support, but with no other additional third party modules, will be
installed for you to a directory of your choice.

2. No: I want to customize my Nginx installation. (for advanced users)
Choose this if you want to compile Nginx with more third party modules
besides Passenger, or if you need to pass additional options to Nginx's
'configure' script. This installer will  1) ask you for the location of
the Nginx source code,  2) run the 'configure' script according to your
instructions, and  3) run 'make install'.

Whichever you choose, if you already have an existing Nginx configuration file,
then it will be preserved.

Enter your choice (1 or 2) or press Ctrl-C to abort: 1  # 编译安装Nginx

--------------------------------------------
....
Where do you want to install Nginx to?

Please specify a prefix directory [/opt/nginx]: /opt/nginx  # 设置Nginx安装目录,默认的/opt/nginx就可以
六. 配置Nginx
$ vim /opt/nginx/conf/nginx.conf
这一步是很容易出错的,文件内容如下:
#user  nobody;
worker_processes  1;

#error_log  logs/error.log;
#error_log  logs/error.log  notice;
#error_log  logs/error.log  info;

#pid    logs/nginx.pid;


events {
    worker_connections  1024;
}


http {
    passenger_root /var/lib/gems/2.3.0/gems/passenger-5.1.12;
    passenger_ruby /usr/bin/ruby2.3;
    #这两个路径自动生成,可能会不一样,只要检查确认路径下确实有这个东西就行

    include       mime.types;
    default_type  application/octet-stream;

    #log_format  main  '$remote_addr - $remote_user [$time_local] "$request" '
    #                  '$status $body_bytes_sent "$http_referer" '
    #                  '"$http_user_agent" "$http_x_forwarded_for"';

    #access_log  logs/access.log  main;

    sendfile        on;
    #tcp_nopush     on;

    #keepalive_timeout  0;
    keepalive_timeout  65;

    #gzip  on;

    server {
        listen       80;
        server_name  192.168.0.124; #所部署设备的IP地址

        #charset koi8-r;

        #access_log  logs/host.access.log  main;

        root /var/www/redmine/public;

        passenger_enabled on;
        client_max_body_size 10m;
        #server_name http://192.168.0.124;
        index index.html index.htm index.nginx-debian.html;

        #location / {
        #    root   html;
        #    index  index.html index.htm;
        #}

        #error_page  404    /404.html;

        # redirect server error pages to the static page /50x.html
        #
        error_page   500 502 503 504  /50x.html;
        location = /50x.html {
        root   html;
        }

        # proxy the PHP scripts to Apache listening on 127.0.0.1:80
        #
        #location ~ \.php$ {
        #    proxy_pass   http://127.0.0.1;
        #}

        # pass the PHP scripts to FastCGI server listening on 127.0.0.1:9000
        #
        #location ~ \.php$ {
        #    root           html;
        #    fastcgi_pass   127.0.0.1:9000;
        #    fastcgi_index  index.php;
        #    fastcgi_param  SCRIPT_FILENAME  /scripts$fastcgi_script_name;
        #    include        fastcgi_params;
        #}

        # deny access to .htaccess files, if Apache's document root
        # concurs with nginx's one
        #
        #location ~ /\.ht {
        #    deny  all;
        #}
    }

    # another virtual host using mix of IP-, name-, and port-based configuration
    #
    #server {
    #    listen       8000;
    #    listen       somename:8080;
    #    server_name  somename  alias  another.alias;

    #    location / {
    #        root   html;
    #        index  index.html index.htm;
    #    }
    #}


    # HTTPS server
    #
    #server {
    #    listen       443 ssl;
    #    server_name  localhost;

    #    ssl_certificate      cert.pem;
    #    ssl_certificate_key  cert.key;

    #    ssl_session_cache    shared:SSL:1m;
    #    ssl_session_timeout  5m;

    #    ssl_ciphers  HIGH:!aNULL:!MD5;
    #    ssl_prefer_server_ciphers  on;

    #    location / {
    #        root   html;
    #        index  index.html index.htm;
    #    }
    #}

}
测试Nginx配置:
$ /opt/nginx/sbin/nginx -t
把Nginx配置为Systemd服务:
vim /lib/systemd/system/nginx.service
写入内容:
[Unit]
Description=The NGINX HTTP and reverse proxy server
After=syslog.target network.target remote-fs.target nss-lookup.target

[Service]
Type=forking
PIDFile=/opt/nginx/logs/nginx.pid
ExecStartPre=/opt/nginx/sbin/nginx -t
ExecStart=/opt/nginx/sbin/nginx
ExecReload=/bin/kill -s HUP $MAINPID
ExecStop=/bin/kill -s QUIT $MAINPID
PrivateTmp=true

[Install]
WantedBy=multi-user.target
启动Nginx服务:
systemctl daemon-reload
systemctl start nginx
七. 后续操作
gem install bundler
bundle install --without development test
生成tocken和数据表:
bundle exec rake generate_secret_token
RAILS_ENV=production bundle exec rake db:migrate
RAILS_ENV=production bundle exec rake redmine:load_default_data
这里,语言选择默认的[en]就好,不选[zh]同样支持中文。
最后,重启Nginx:
systemctl restart nginx
直接访问地址192.168.0.124:80即可。
八. 疑难问题
1. 版本间的依赖关系
很多莫名其妙的bug都是由于版本依赖引起的,官方给出的Redmine、Ruby、Rails的依赖关系如下:
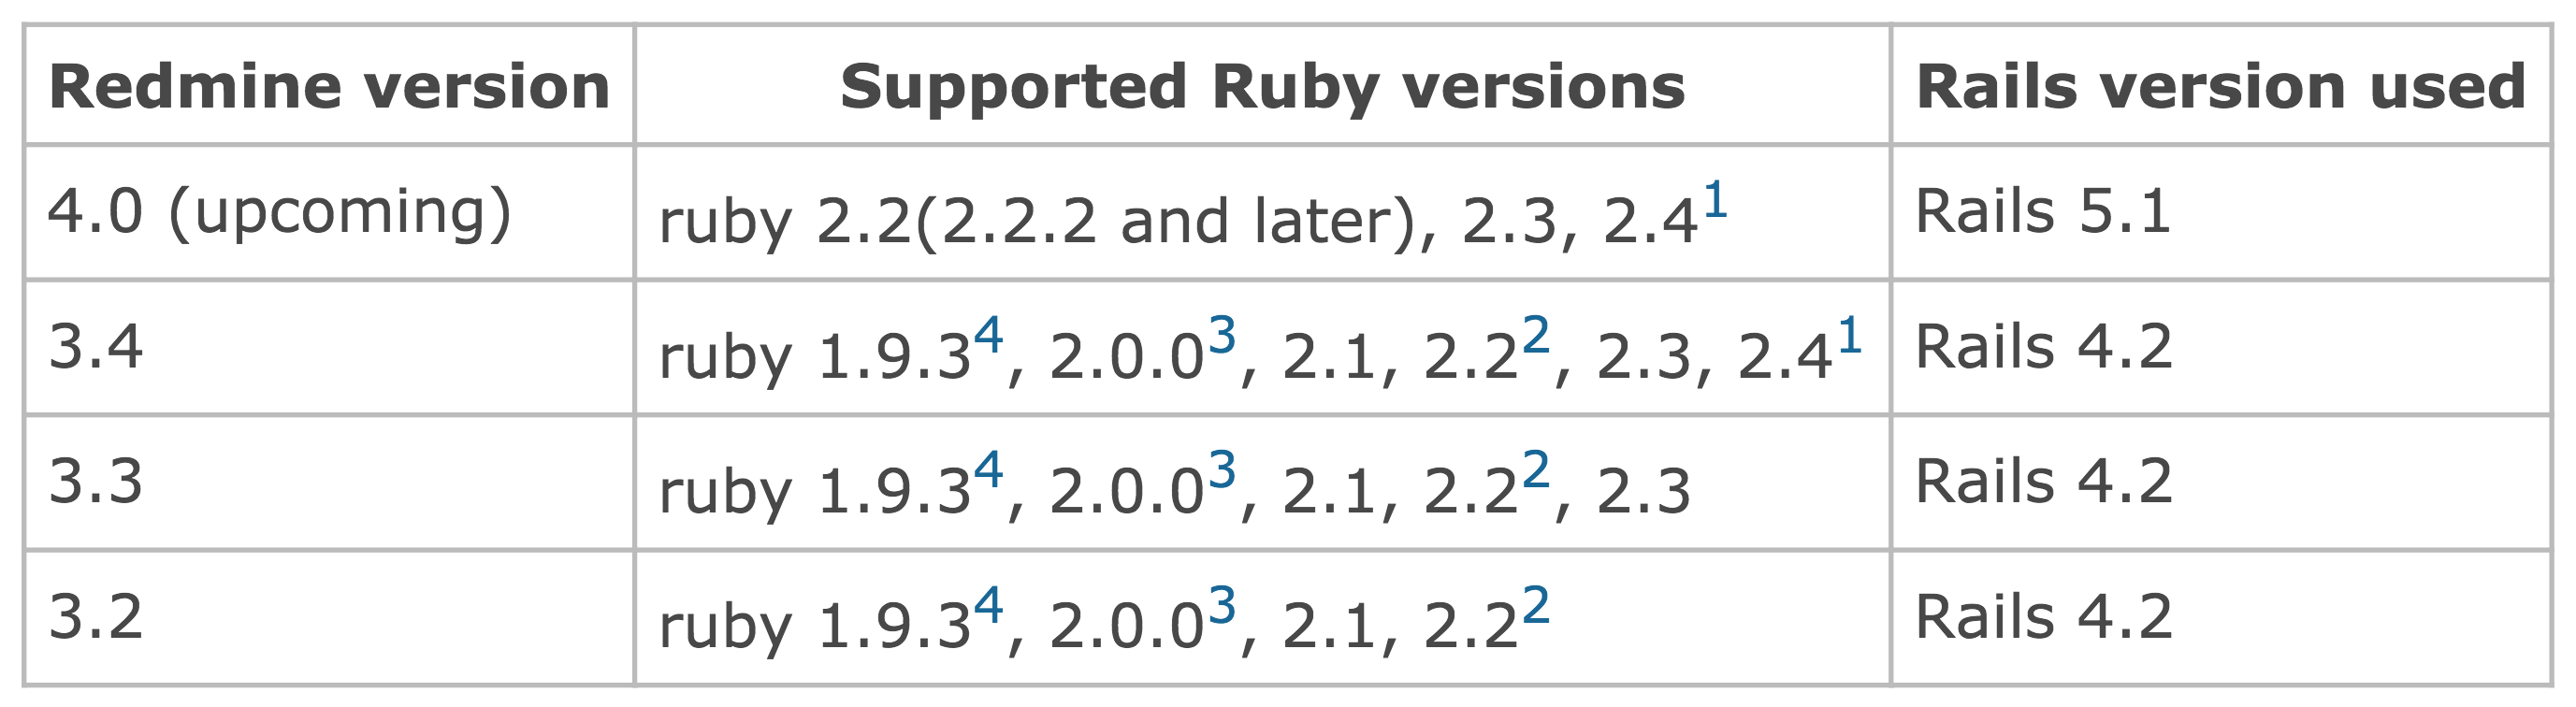
终端命令:rails/ruby/nginx/rvm -v,以及:mysql –version,可以查看版本号。
楼长实际部署采用的版本为:
Redmine 3.2
Rails 4.2.7.1
ruby 2.3.0p0 (2015-12-25 revision 53290) [x86_64-linux]
nginx version: nginx/1.10.3 (Ubuntu)
rvm 1.29.3 (latest) by Michal Papis, Piotr Kuczynski, Wayne E. Seguin [https://rvm.io]
mysql  Ver 14.14 Distrib 5.7.21, for Linux (x86_64) using  EditLine wrapper
2. 出现500 Internal error错误
登陆后,进入个人页面或设置中,就会提示500 Internal error错误:
Internal error
An error occurred on the page you were trying to access.
If you continue to experience problems please contact your Redmine administrator for assistance.
If you are the Redmine administrator, check your log files for details about the error.
但首页等地方,却没有问题,翻阅资料查出可能是language的问题
cd /var/www/redmine
vim app/helpers/application_helper.rb
定位到这段代码:
def lang_options_for_select(blank=true)
    (blank ? [["(auto)", ""]] : []) + languages_options
end
替换成:
def lang_options_for_select(blank=true)
    (blank ? [["(auto)", ""]] : []) + valid_languages.collect{|lang| [ ll(lang.to_s, :general_lang_name), lang.to_s]}.sort{|x,y| x.last <=> y.last }
end
然后重启Nginx服务,问题解决。
3. 平台可以使用了,唯独上传文件失败
这是由于没有被赋予上传文件的权限,将/var/www/redmine/files目录权限改为777即可:
$ chmod -R 777 /var/www/redmine/files
这是上传文件的默认存储路径。
部署篇主要参考的文献如下:
[1]. http://blog.topspeedsnail.com/archives/9131
[2]. http://www.redmine.org/projects/redmine/wiki/RedmineInstall#Step-2-Create-an-empty-database-and-accompanying-user
[3]. http://blog.csdn.net/u012410733/article/details/61619656
[4]. http://bbs.csdn.net/topics/391070843